Setting up your Sprintcheckout account
To begin, head over to https://sprintcheckout.com/ and create a new account by clicking on the Sign Up button in the top-right corner.Start by adding the details of your store
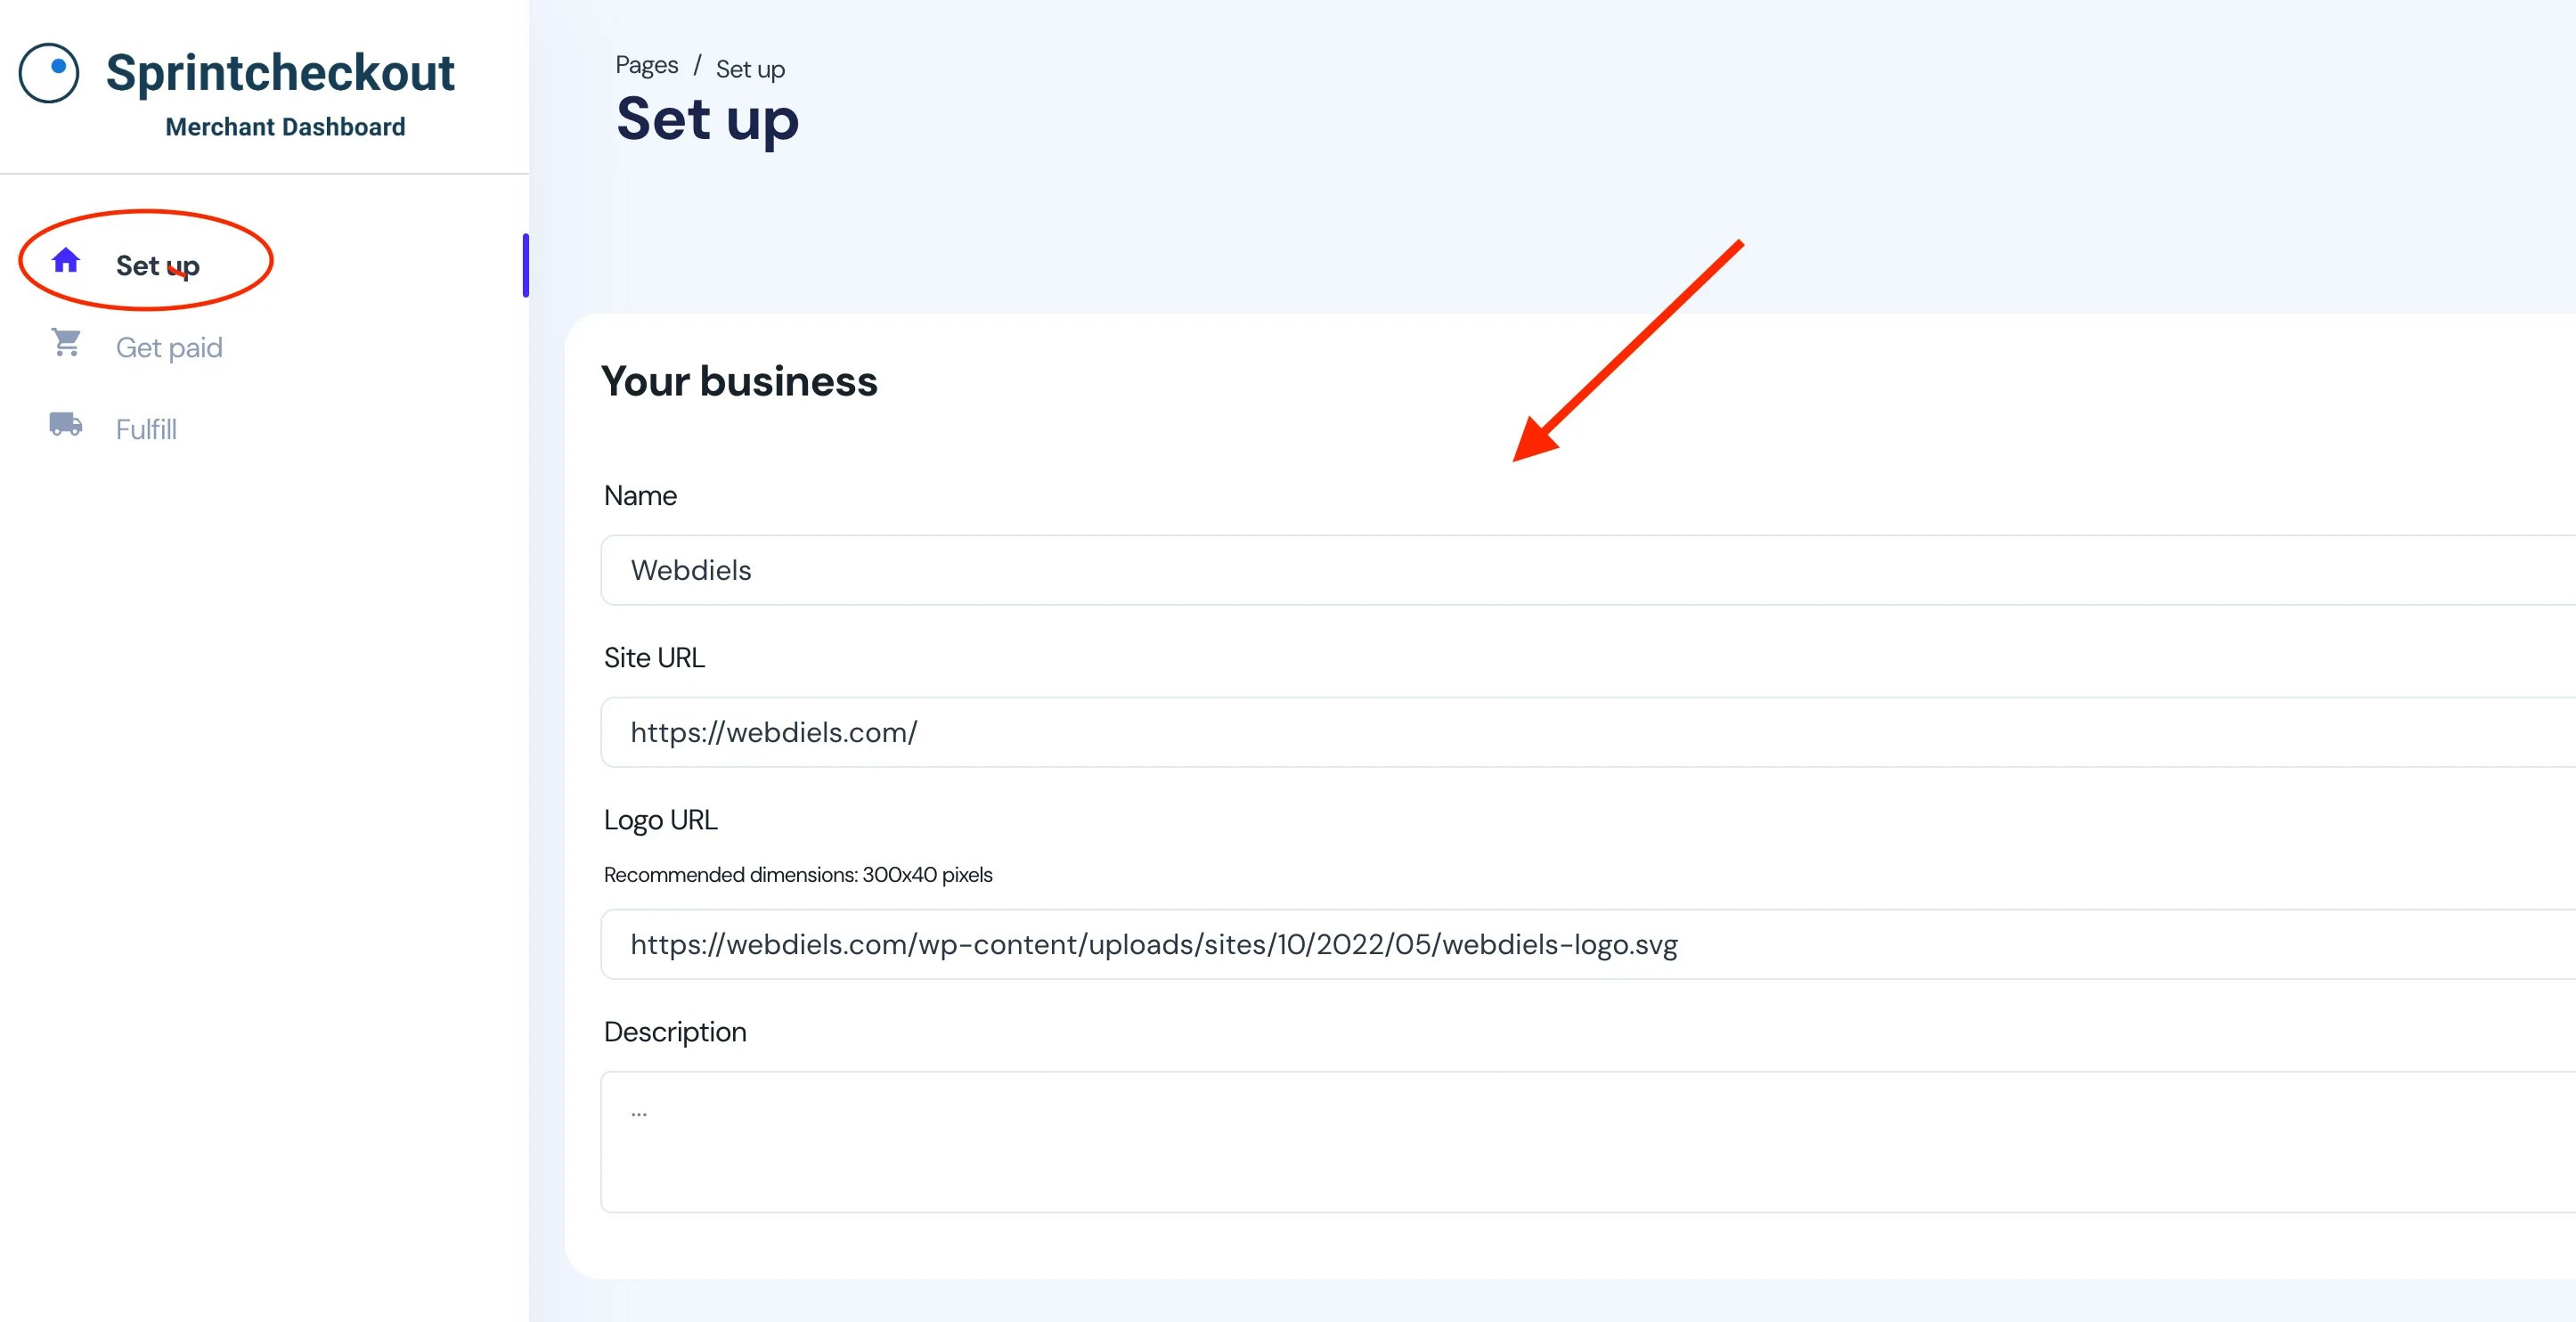
After creating an account on Sprintcheckout, log into your account, and you’ll find yourself on the dashboard.- Click on Set up from the options on the left-hand side.
- Add your store’s name, its URL, and the logo. You can do this by right-clicking on the logo at your store’s landing page and selecting ‘Copy link address’.
- You may also add a brief description of your store.
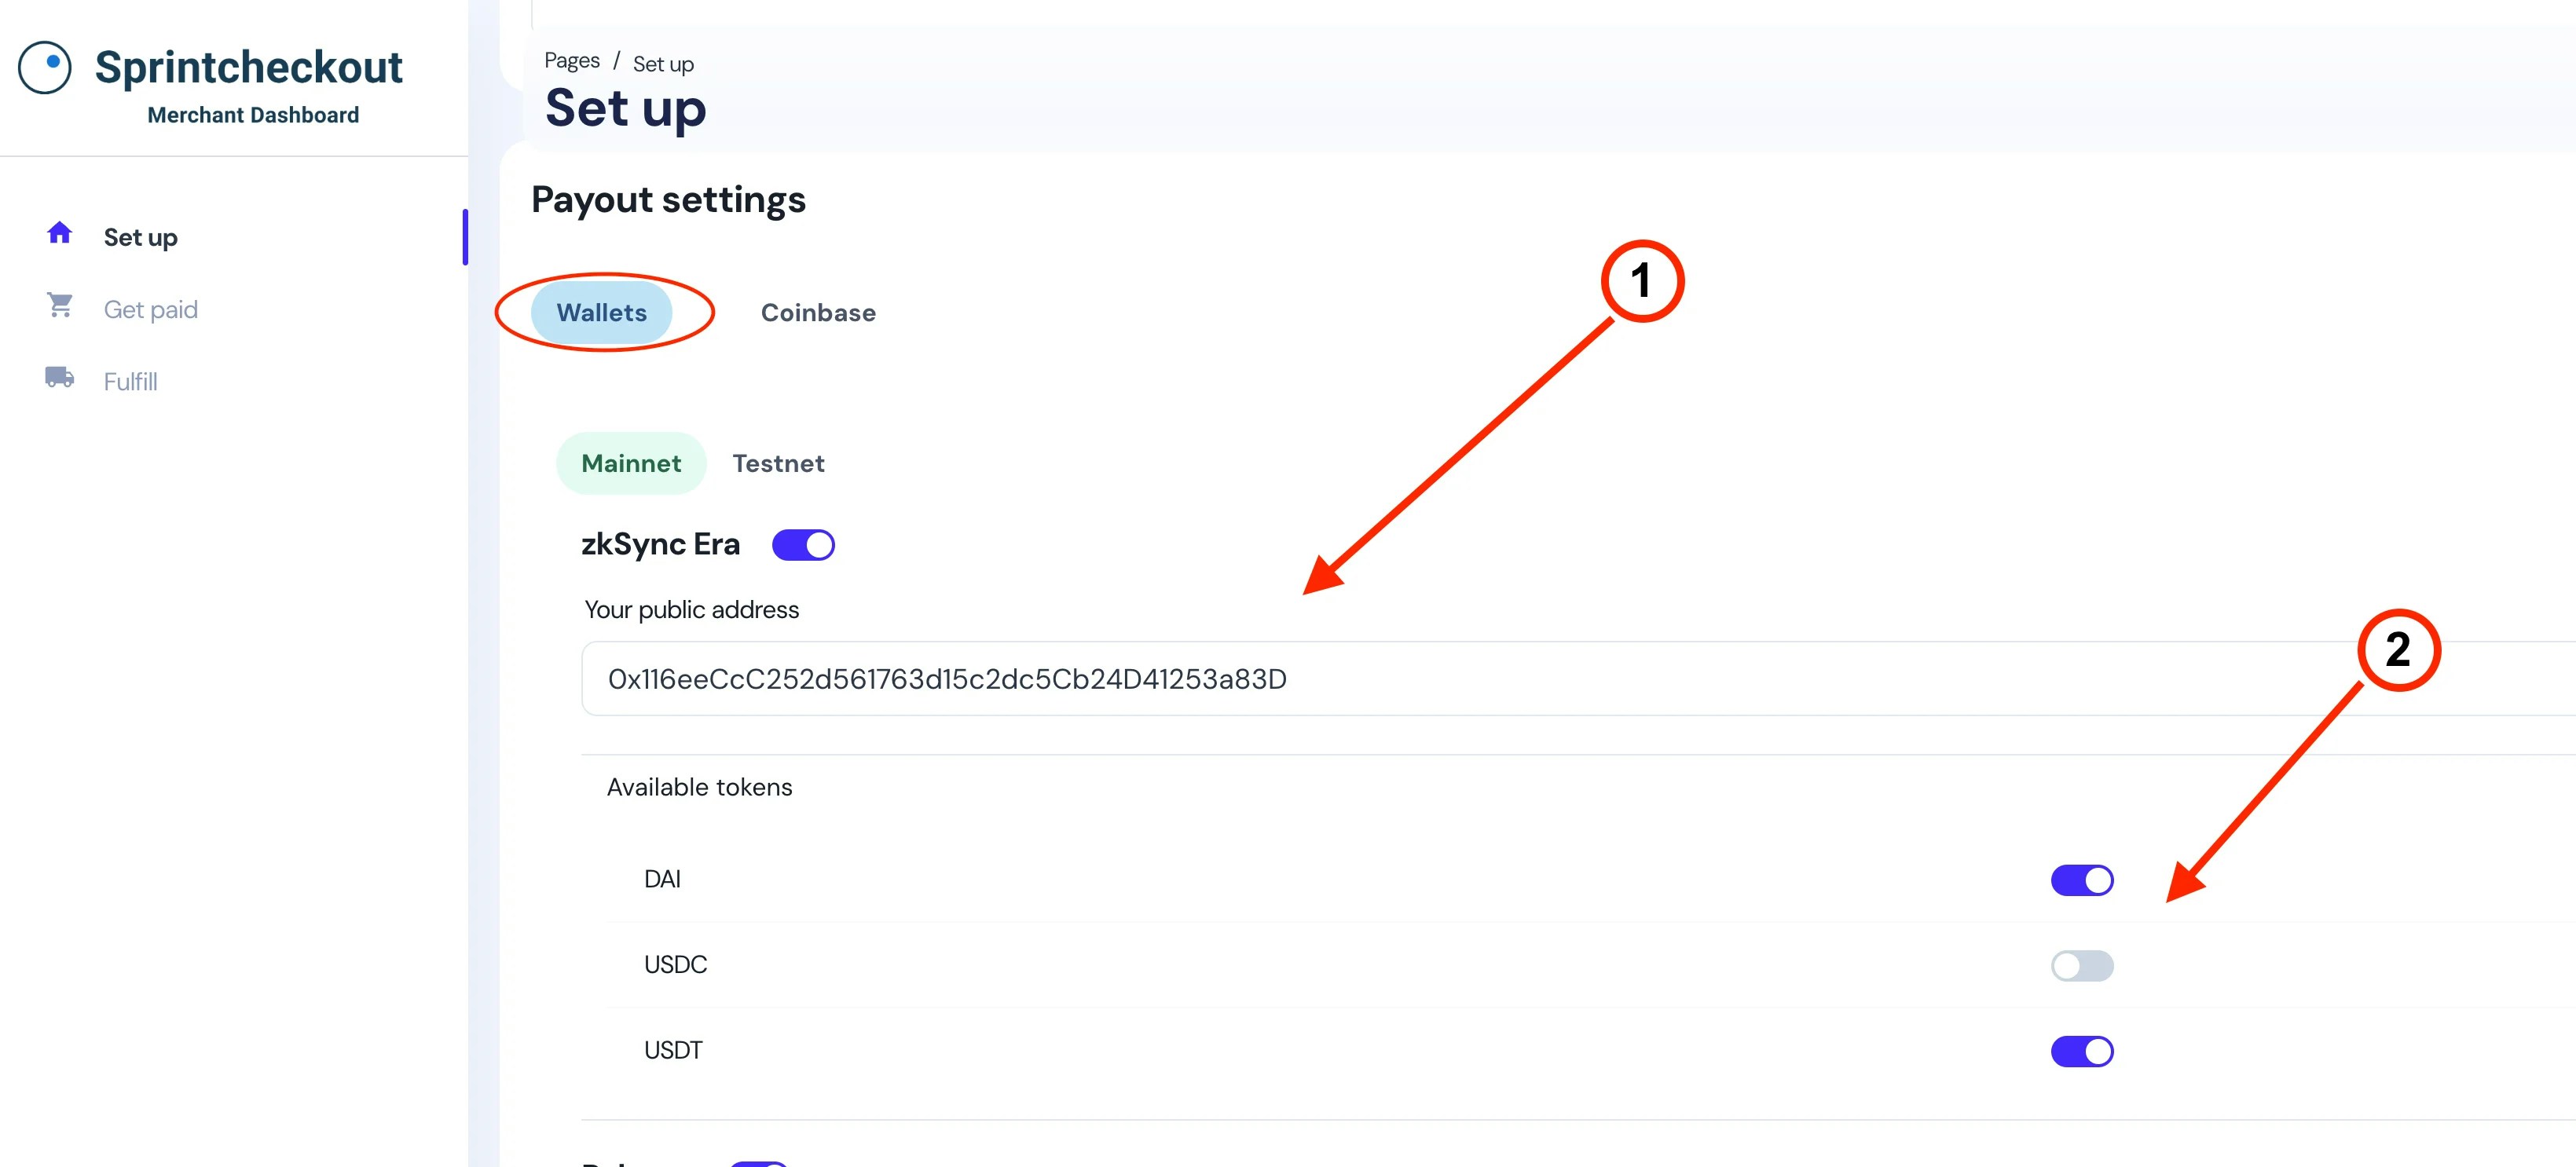
You can now customize the payment parameters
- Scroll down to Payout Settings. In the Wallets tab, you can enable or disable the networks you’d like to support, and paste your public wallet address.
- Select the tokens you’d like to get paid in for each of the networks you choose.
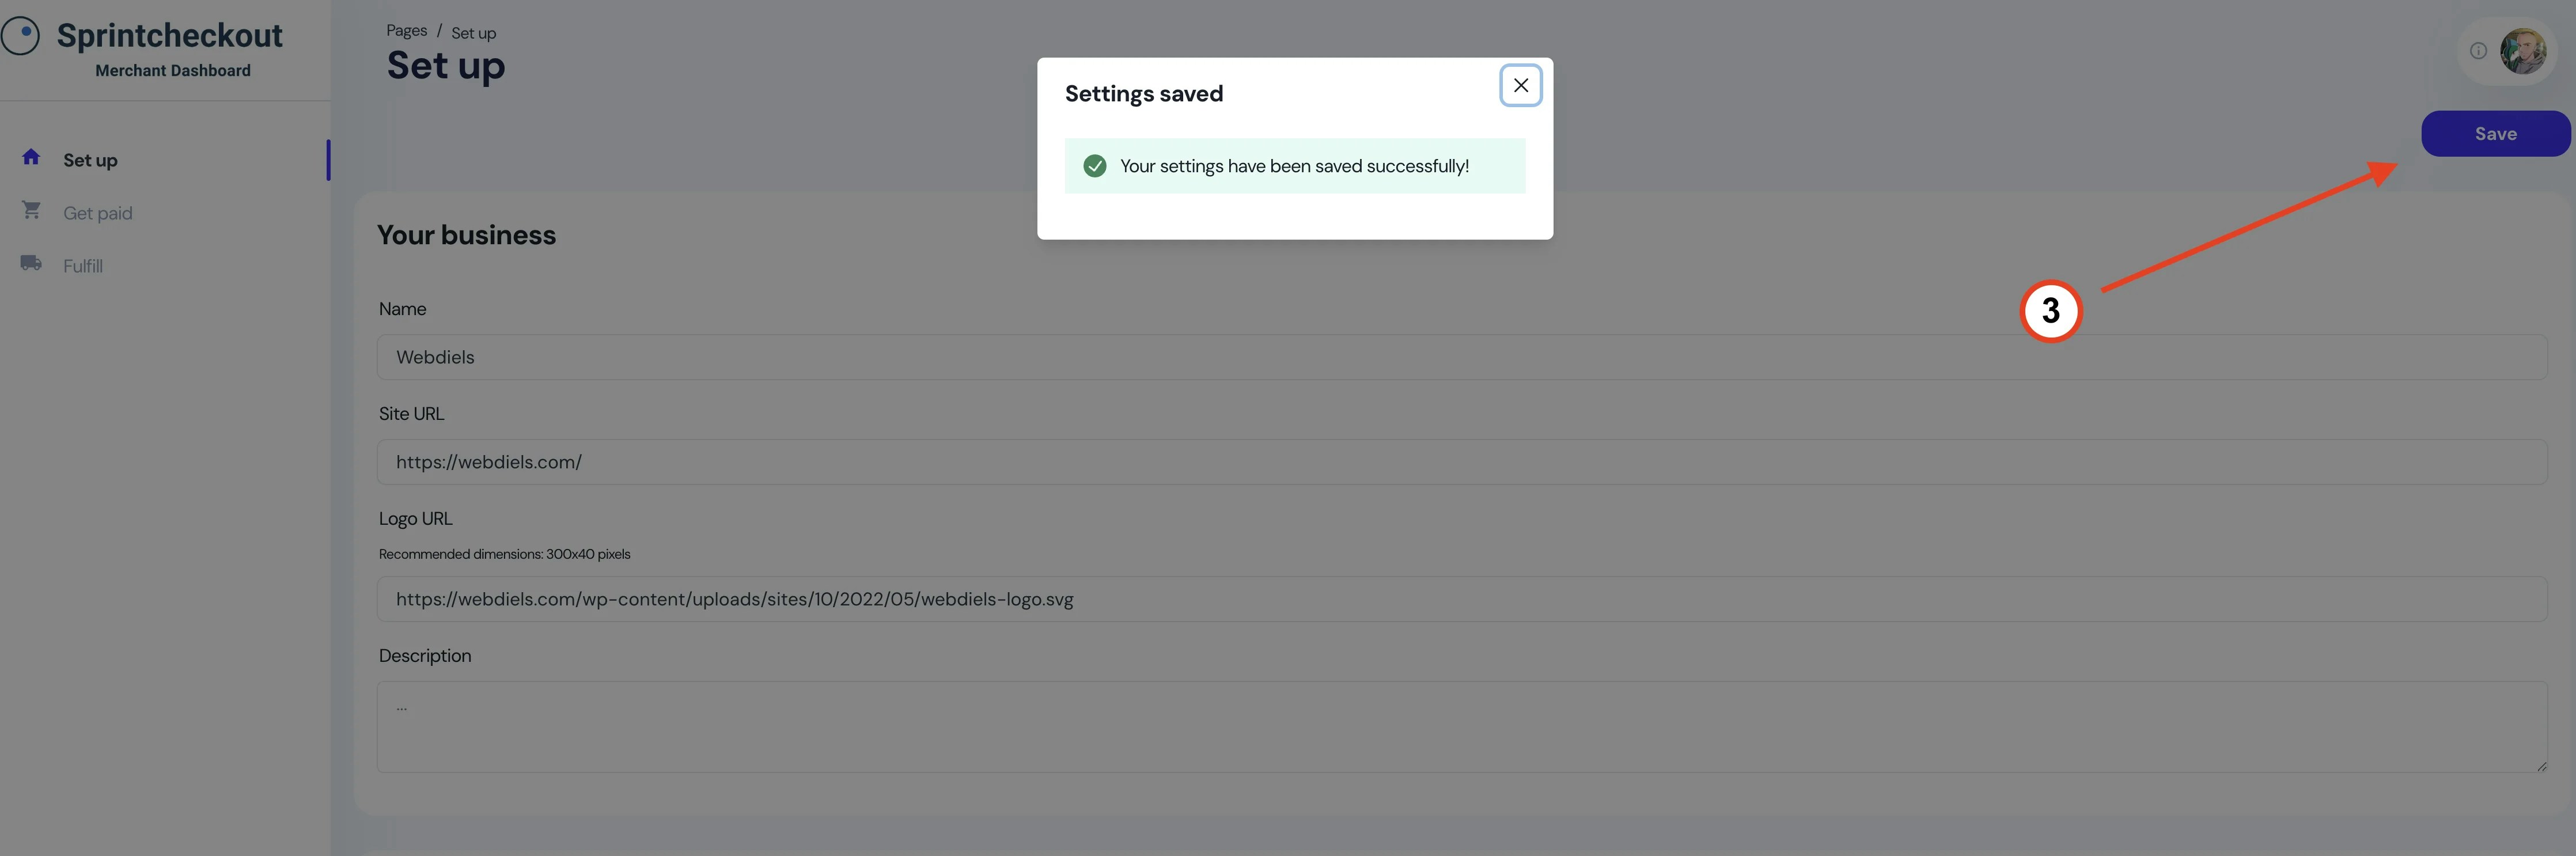
- Once you’re done with the payout settings, scroll back up and click on Save (top-right side of the page).
How to install the Sprintcheckout plugin
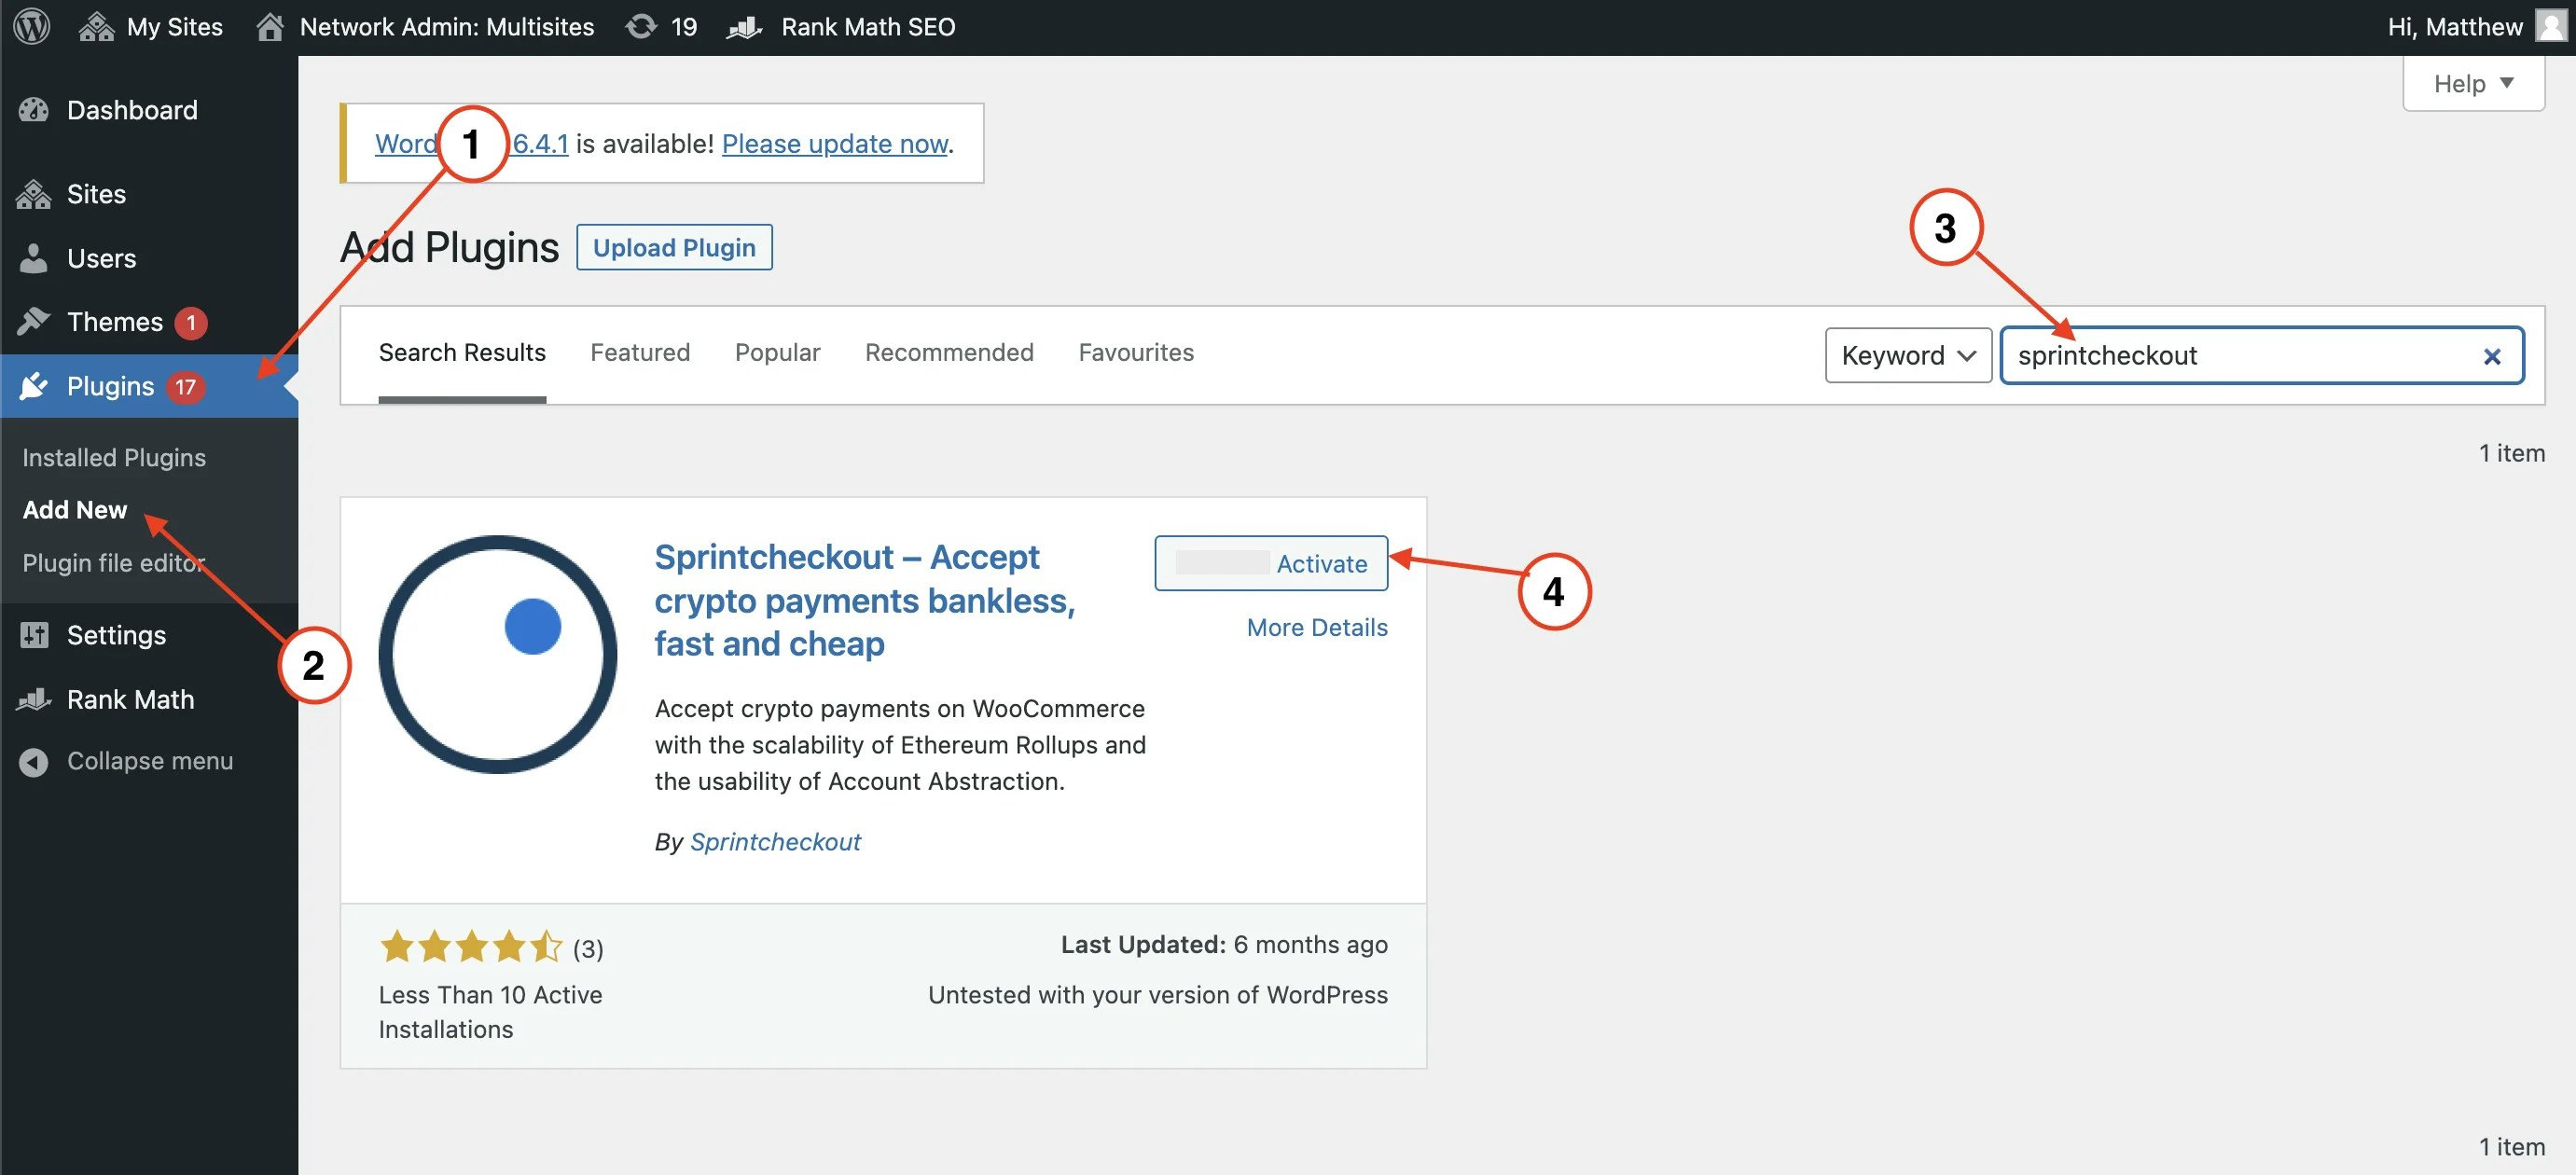
With your Sprintcheckout account all set up we can now download, install, and connect the Sprintcheckout plugin to your store.- Head back to the admin panel of your store and click on Plugins > Add New.
- Type Sprintcheckout in the search tab and, when you find the plugin, click on Install Now.
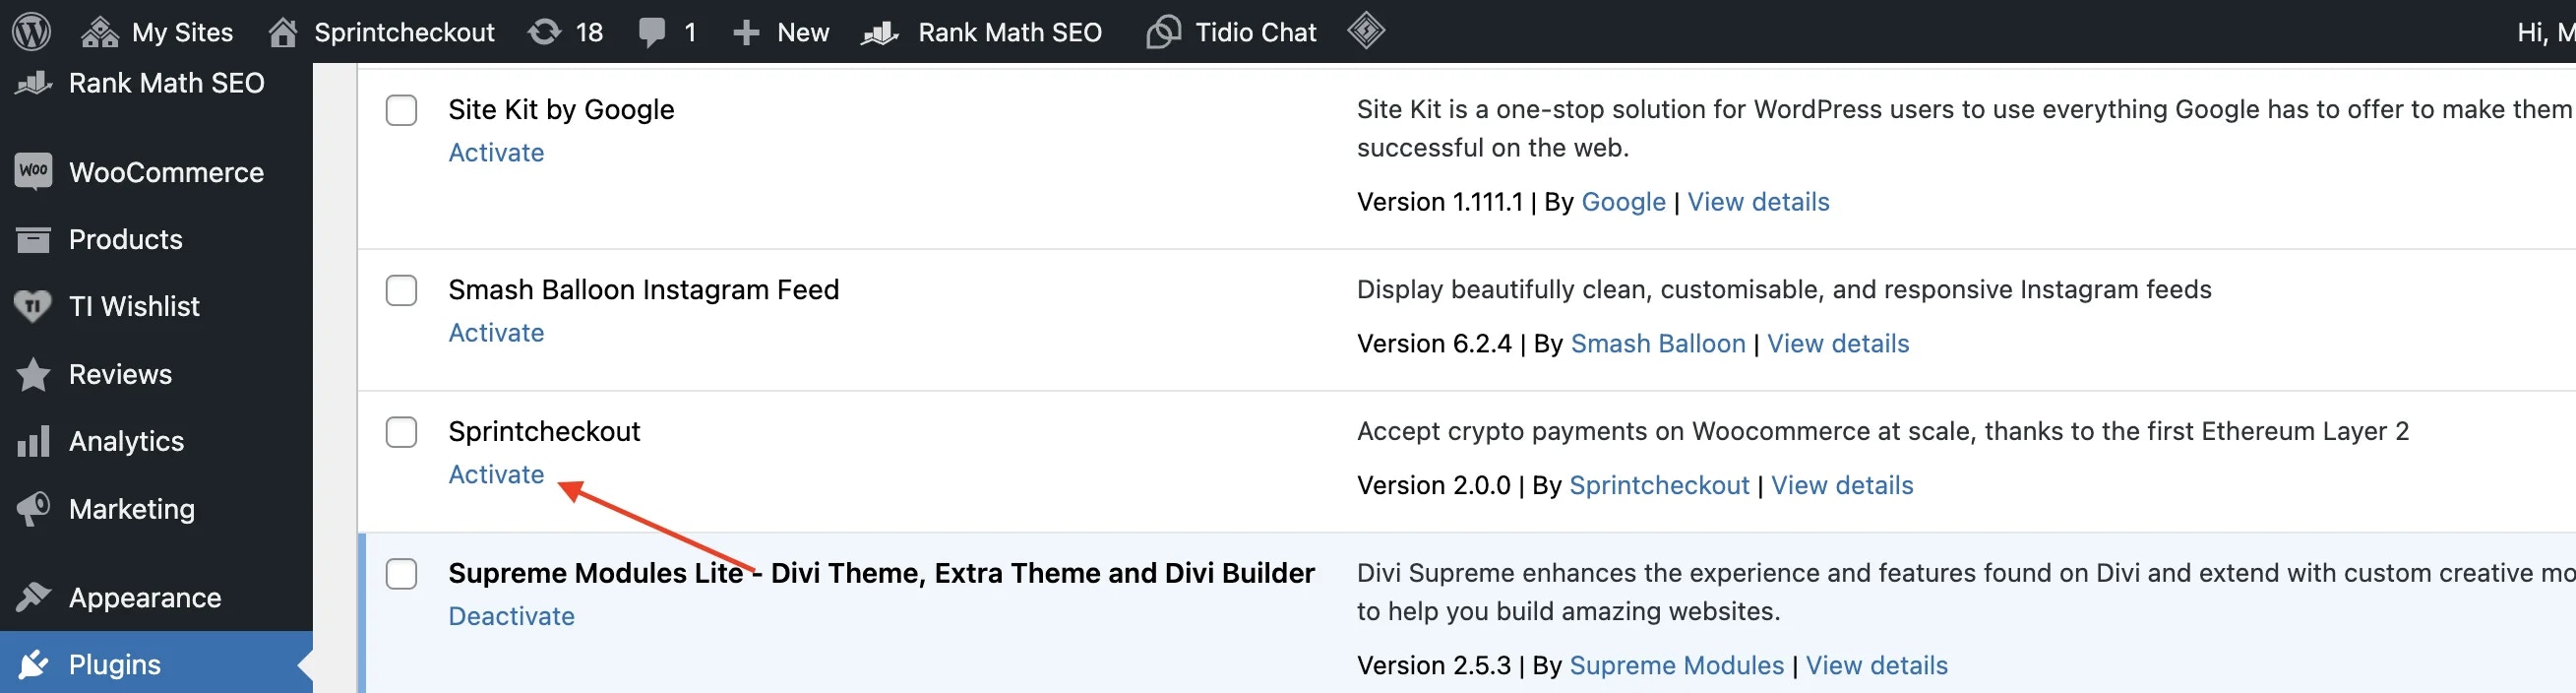
- Once downloaded, click on Plugins > Installed Plugins.
- Scroll down, find Sprintcheckout, and click on Activate.
Connect your Sprintcheckout account to your e-commerce store
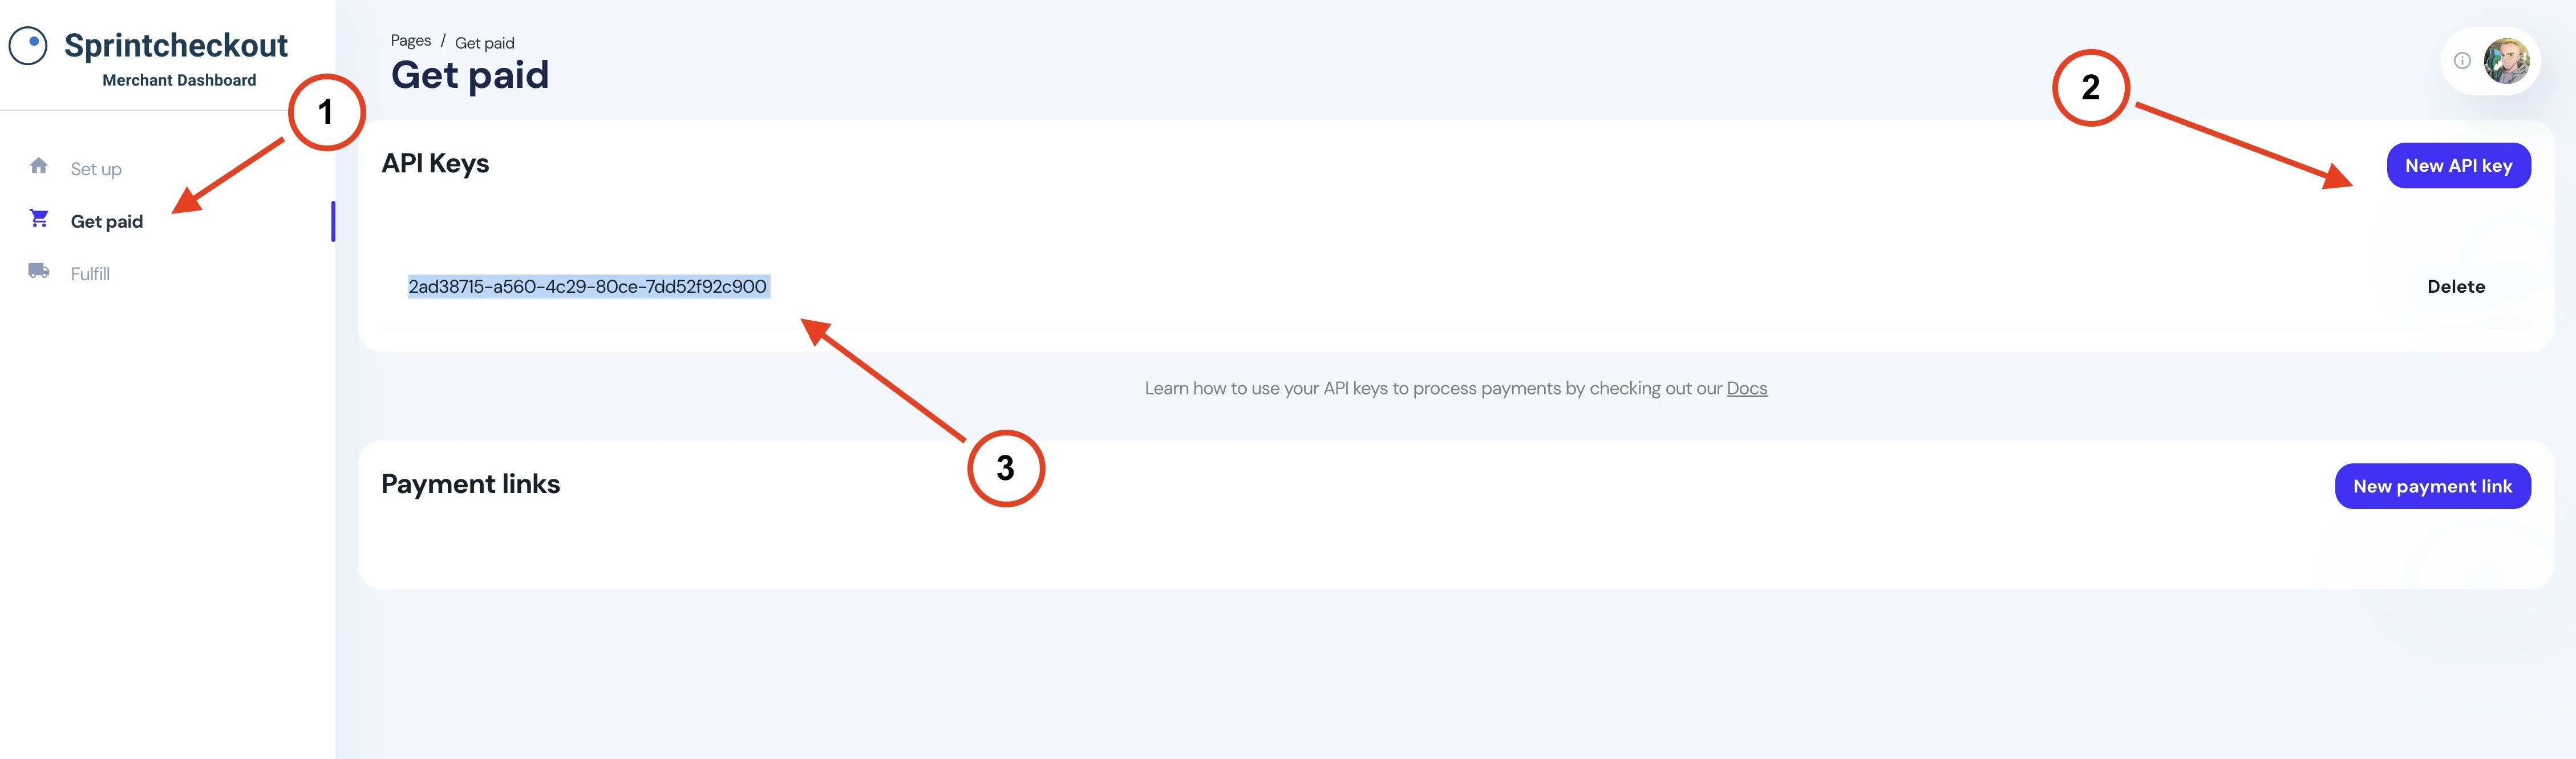
You have successfully downloaded and activated the plugin. Now, let’s connect the plugin with your Sprintcheckout account so you can start accepting payments. This stage consists of 10 steps.- Head back to your Sprintcheckout profile and click on Get paid > New API key
- Go ahead and copy the newly generated API key
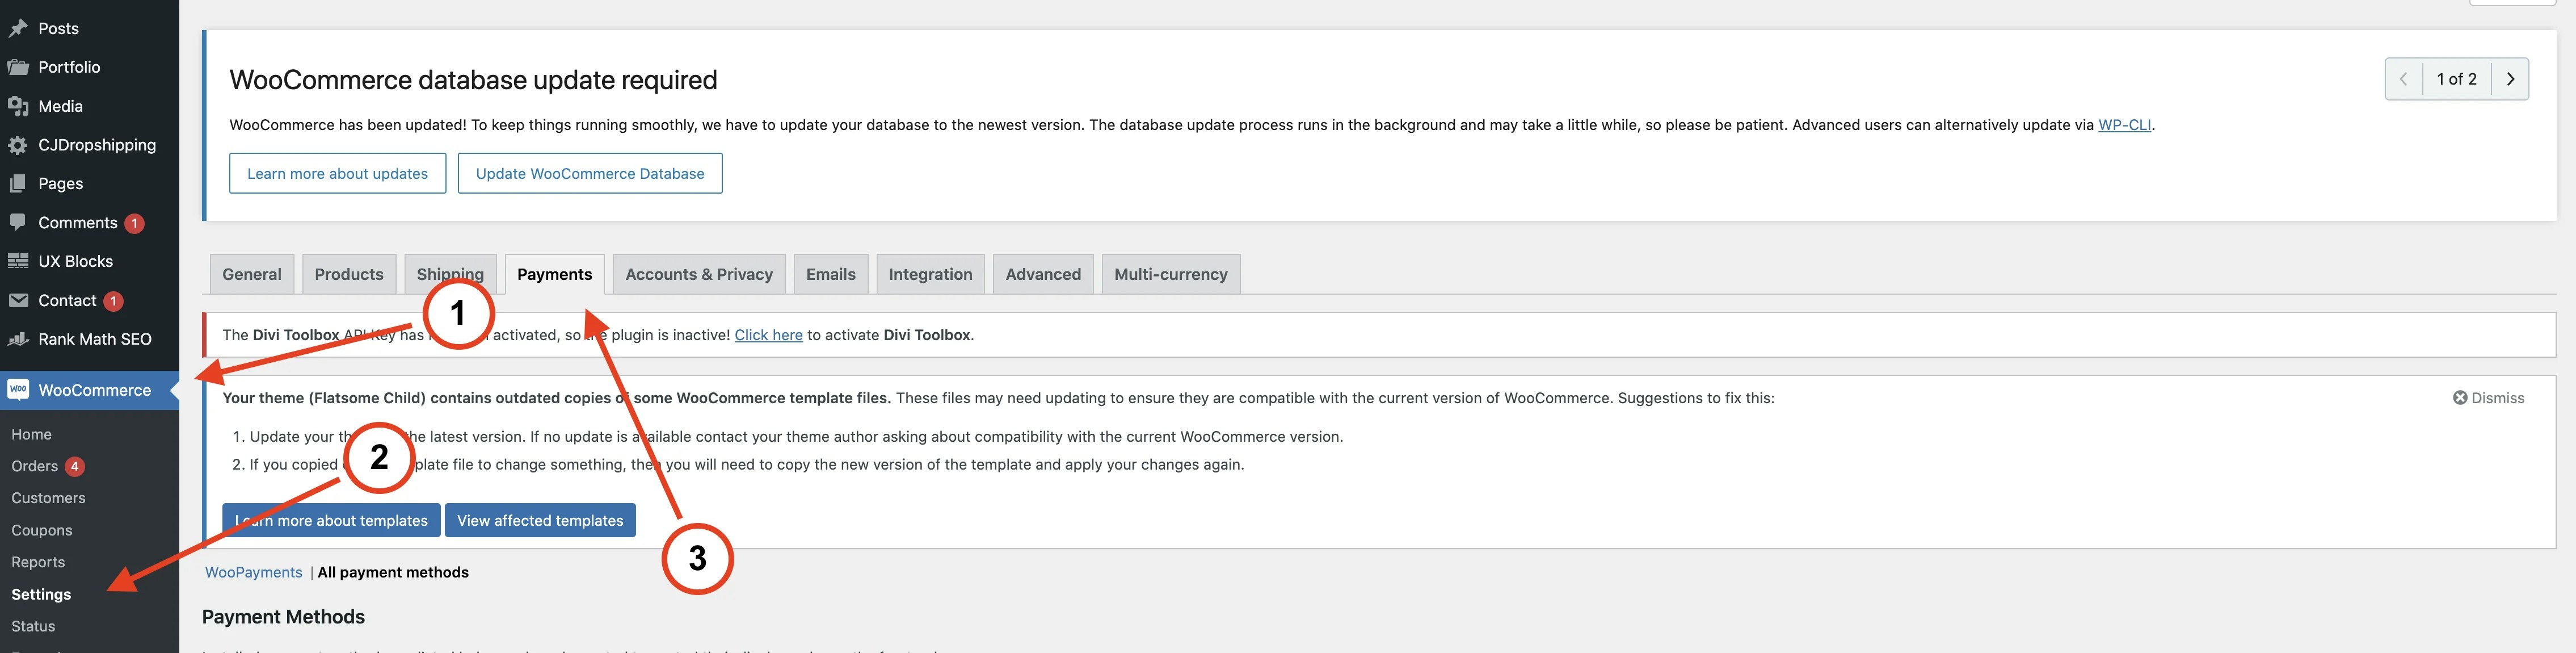
- Head back to your store’s admin panel and, from the column on the left, find Woocommerce > Settings.
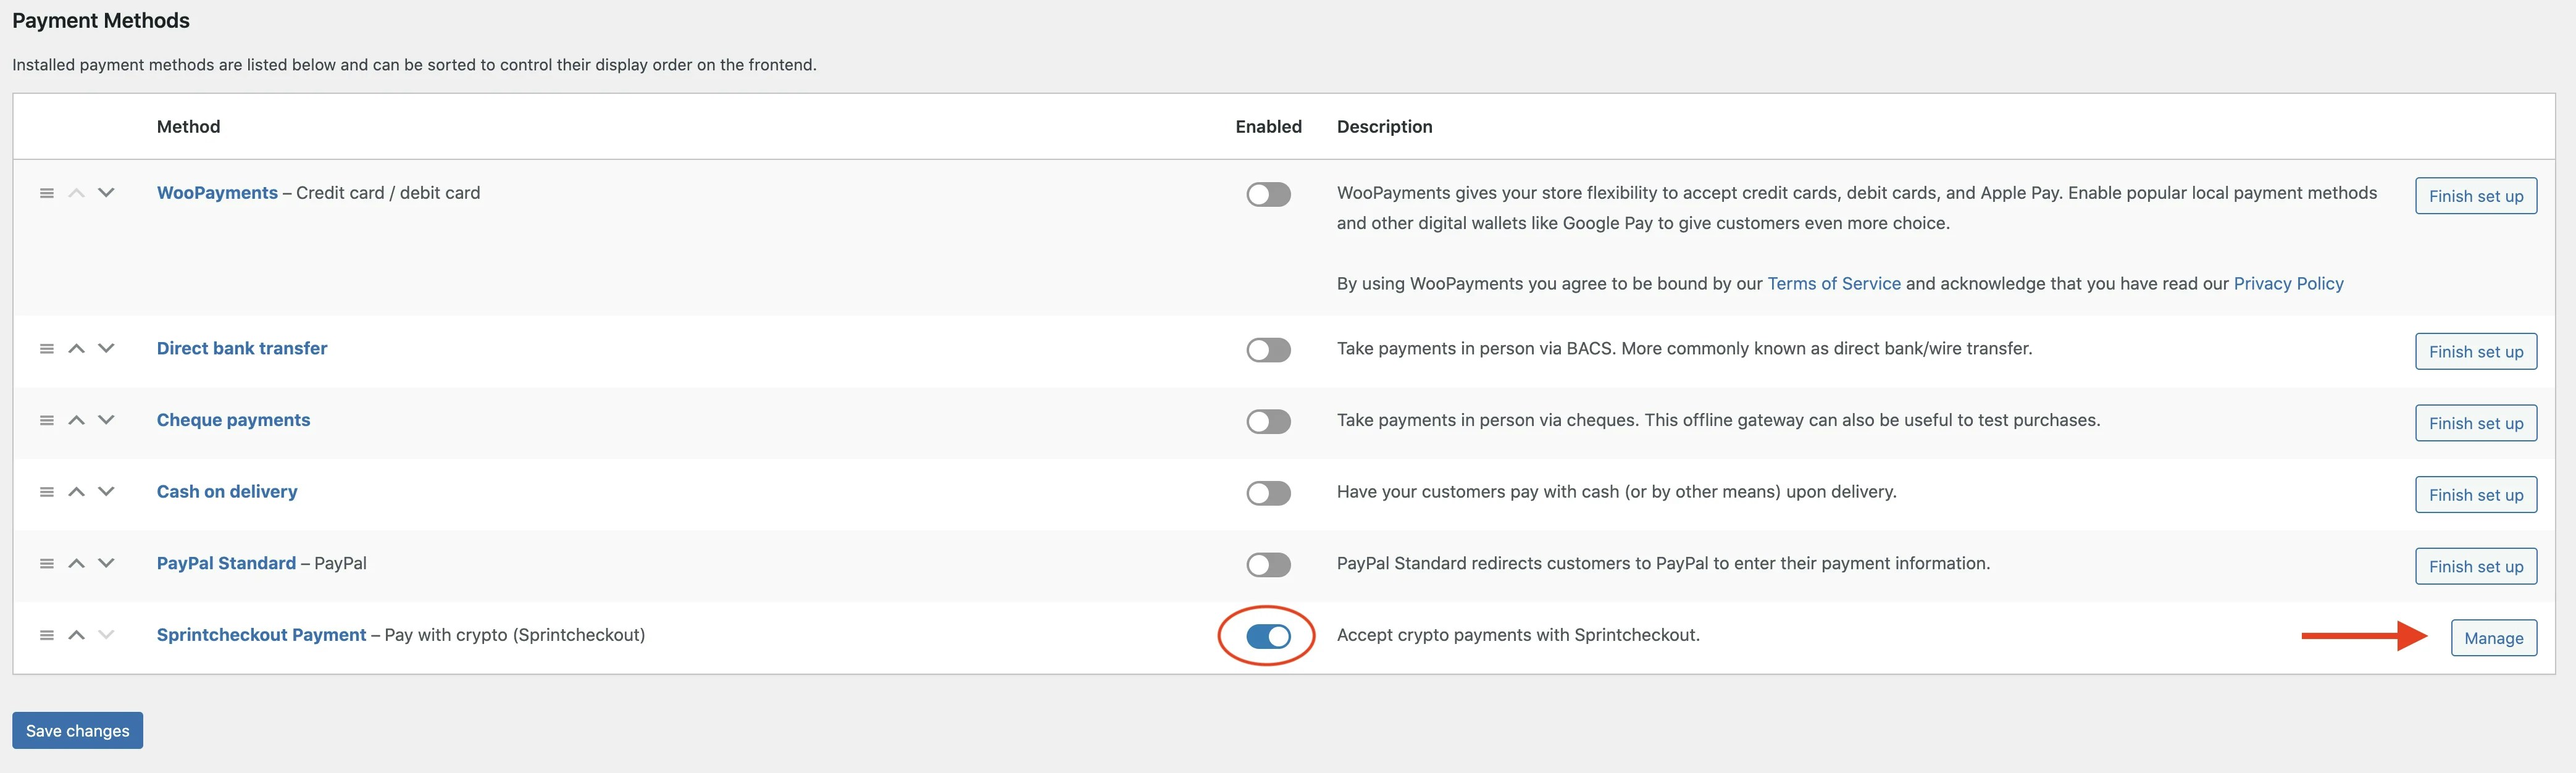
- From the menu bar on the top, click on Payments and scroll down to find Sprintcheckout in the list of payment methods.
- Make sure Sprintcheckout is enabled. If it’s not, you’ll need to enable it manually.
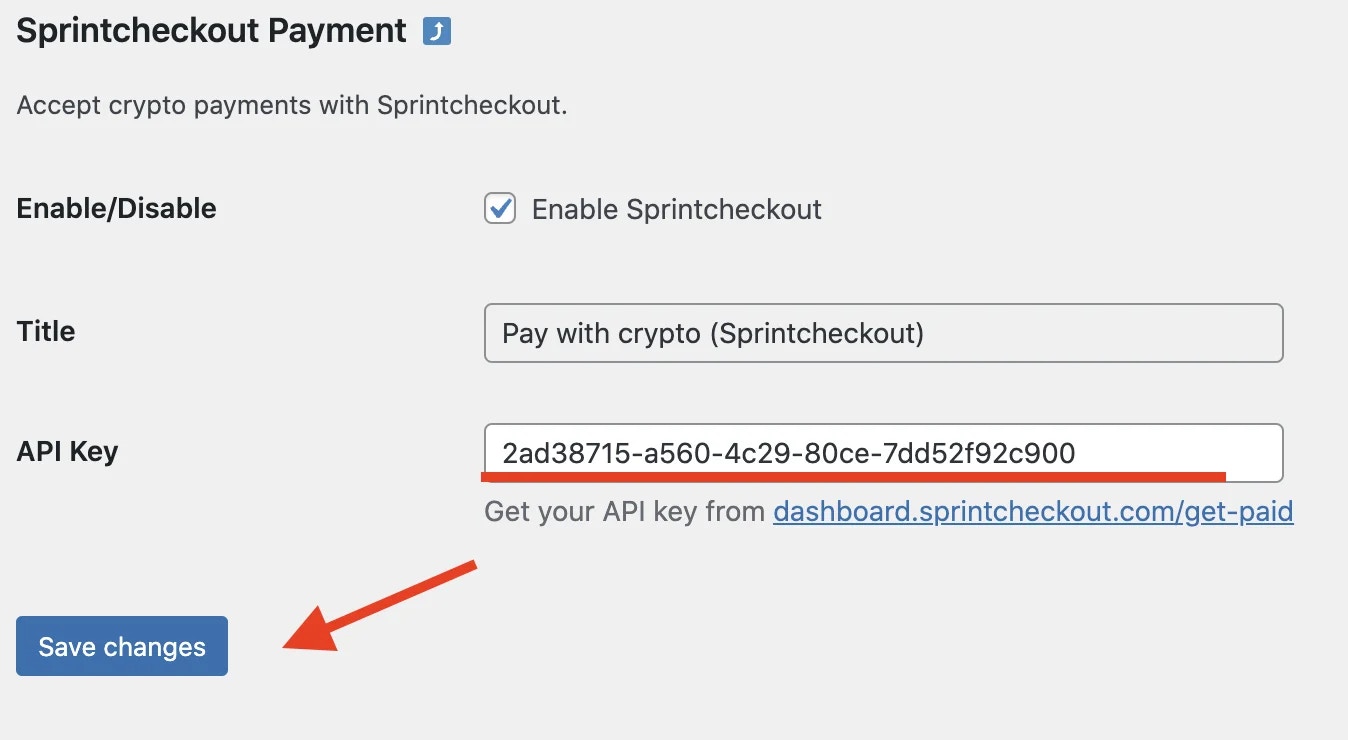
- Once enabled, click on Manage, paste the API key that you previously copied, and click on Save changes.
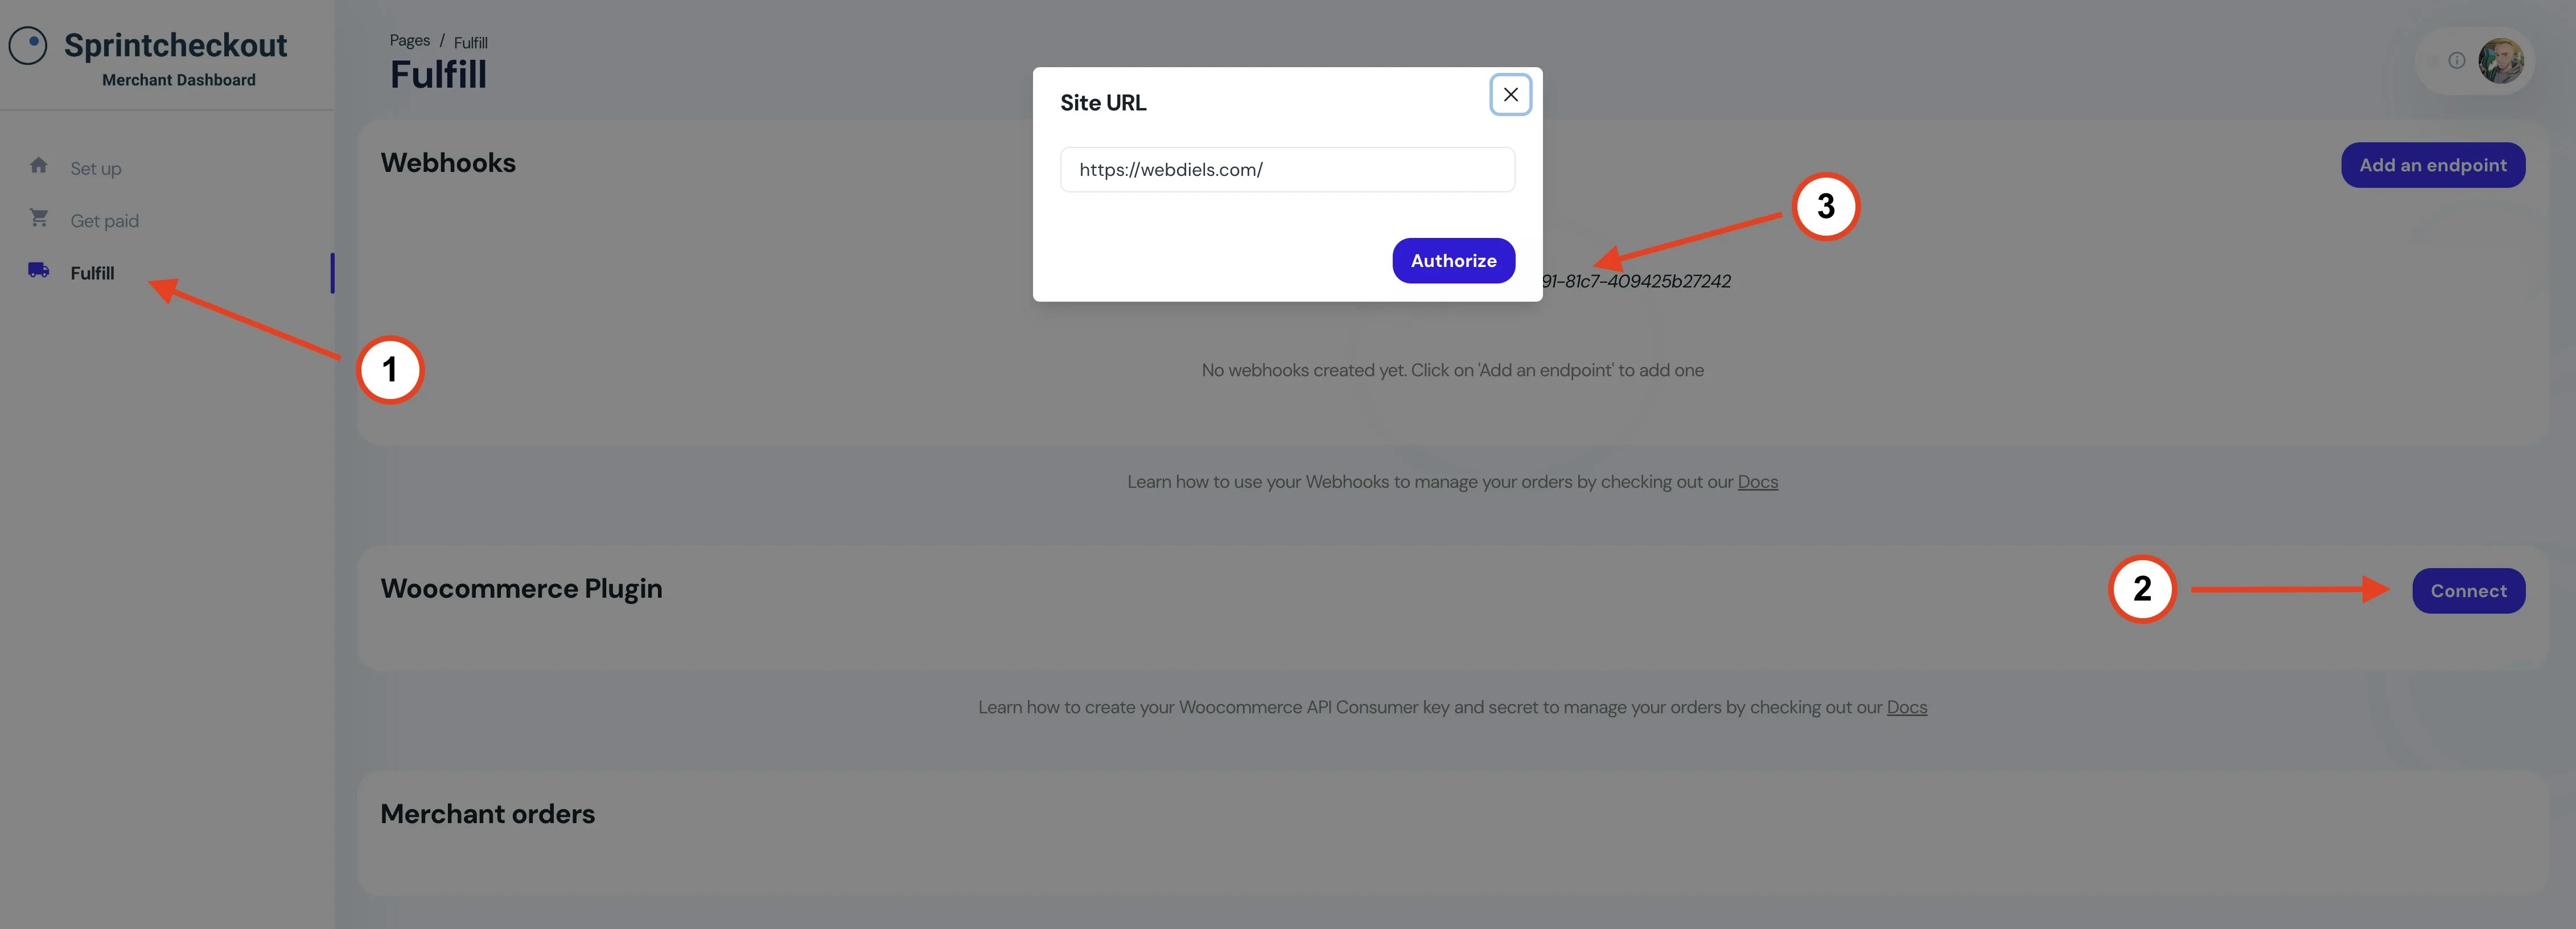
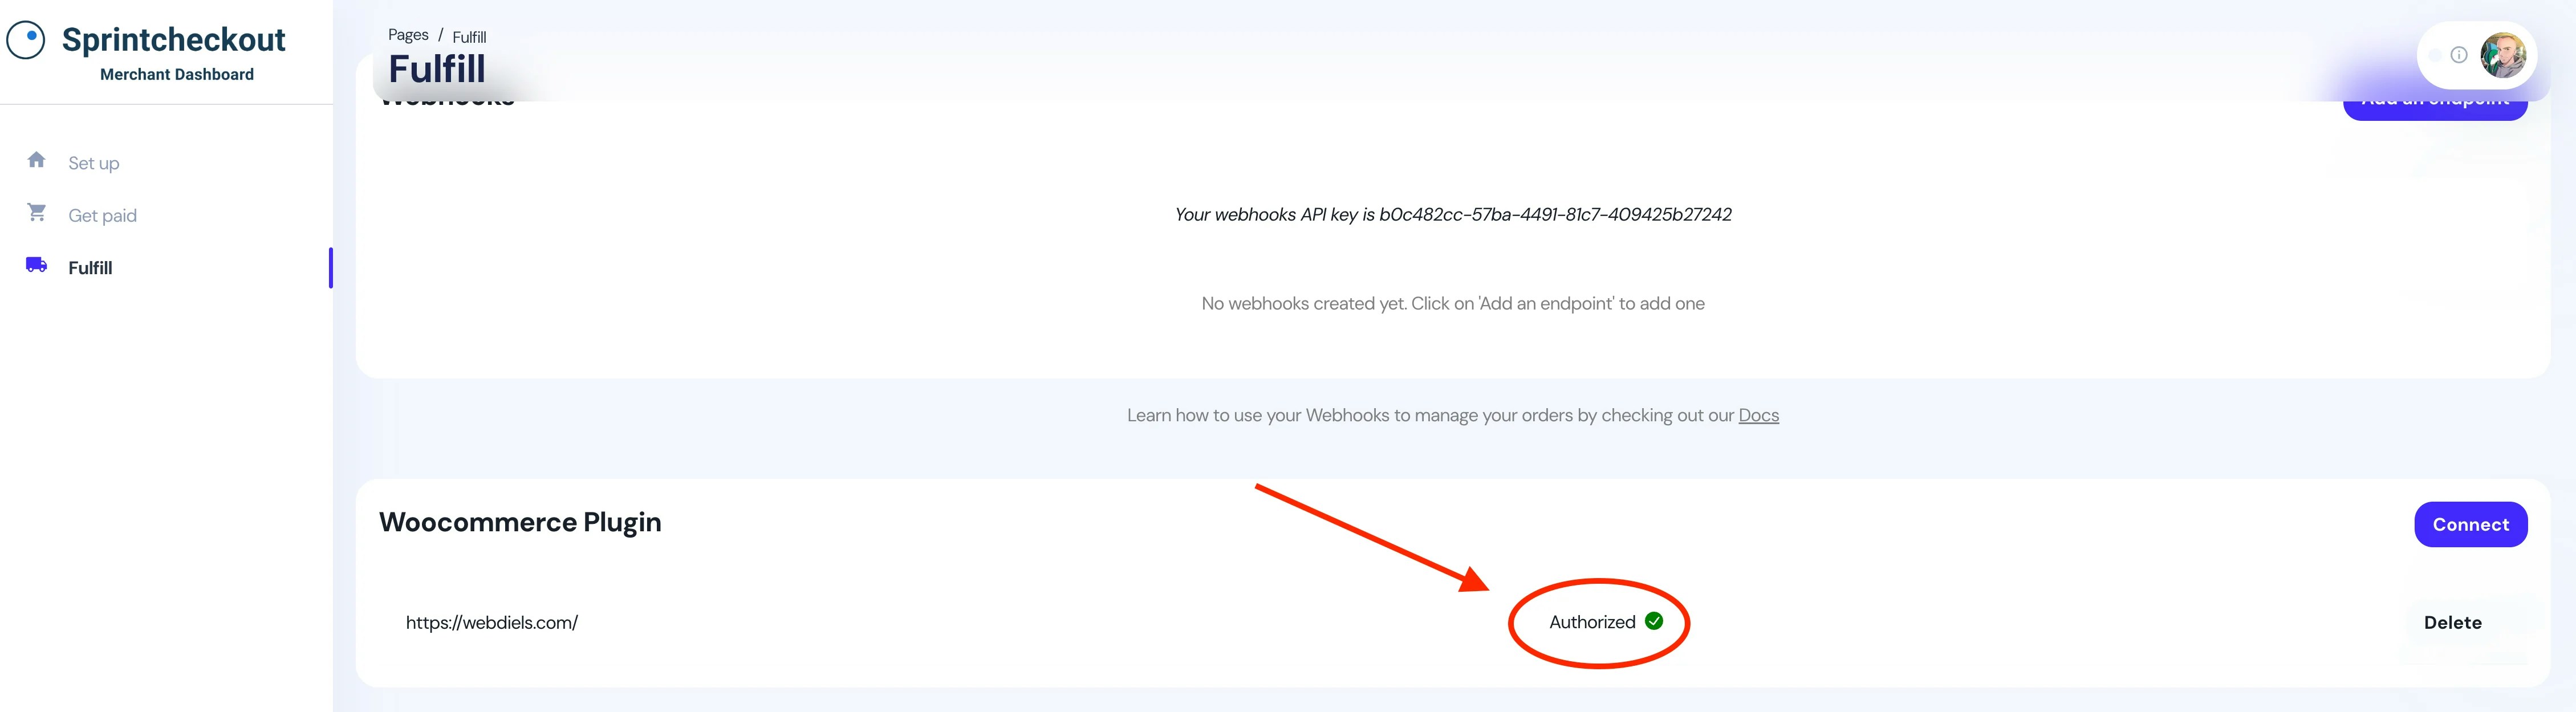
- Now that that’s done, go back to the Sprintcheckout dashboard and click on Fulfil from the column on the left side.
- Find the Woocommerce Plugin section, and click on Connect. A pop-up window will prompt you to enter the site URL. Paste it and click on Authorize.
- You will be redirected to a pop-up window from Woocommerce, where you will need to grant Sprintcheckout access to your store. This is the final step.
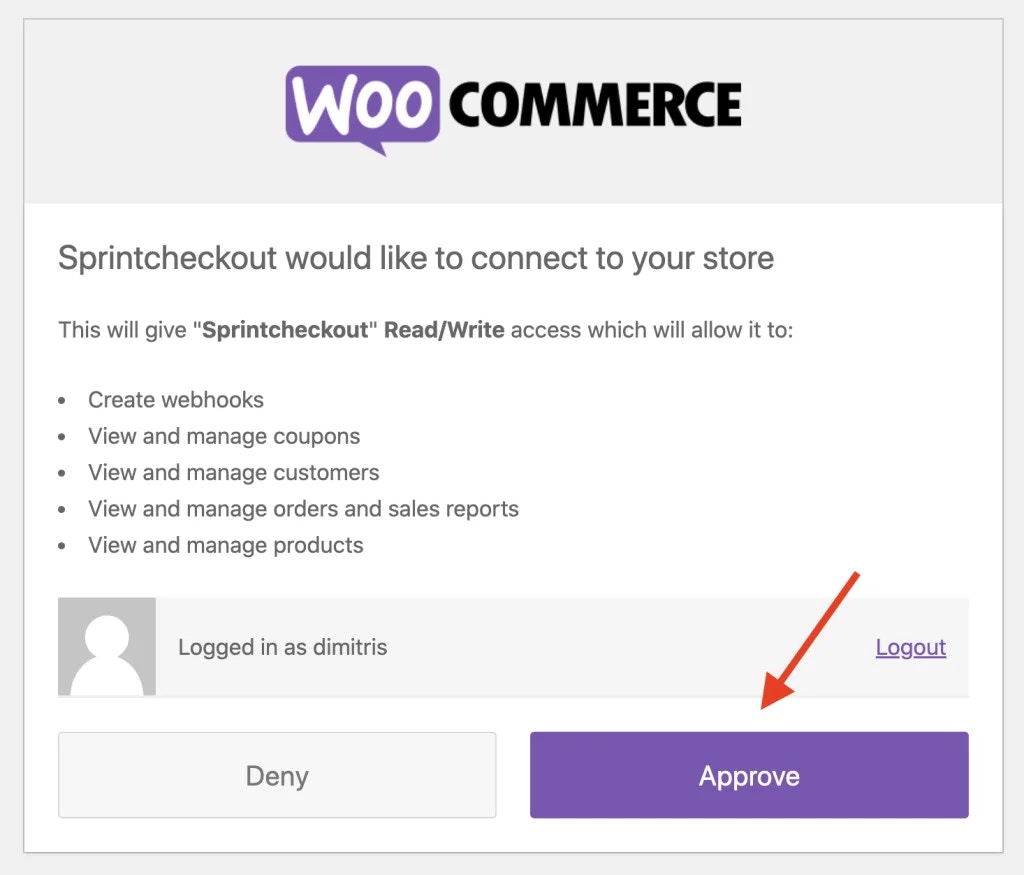
- Click on Approve to complete the process. Sprintcheckout is now successfully connected to your e-commerce store. You can see an authorization check next to your site URL in the Fulfil section.
Time to get paid
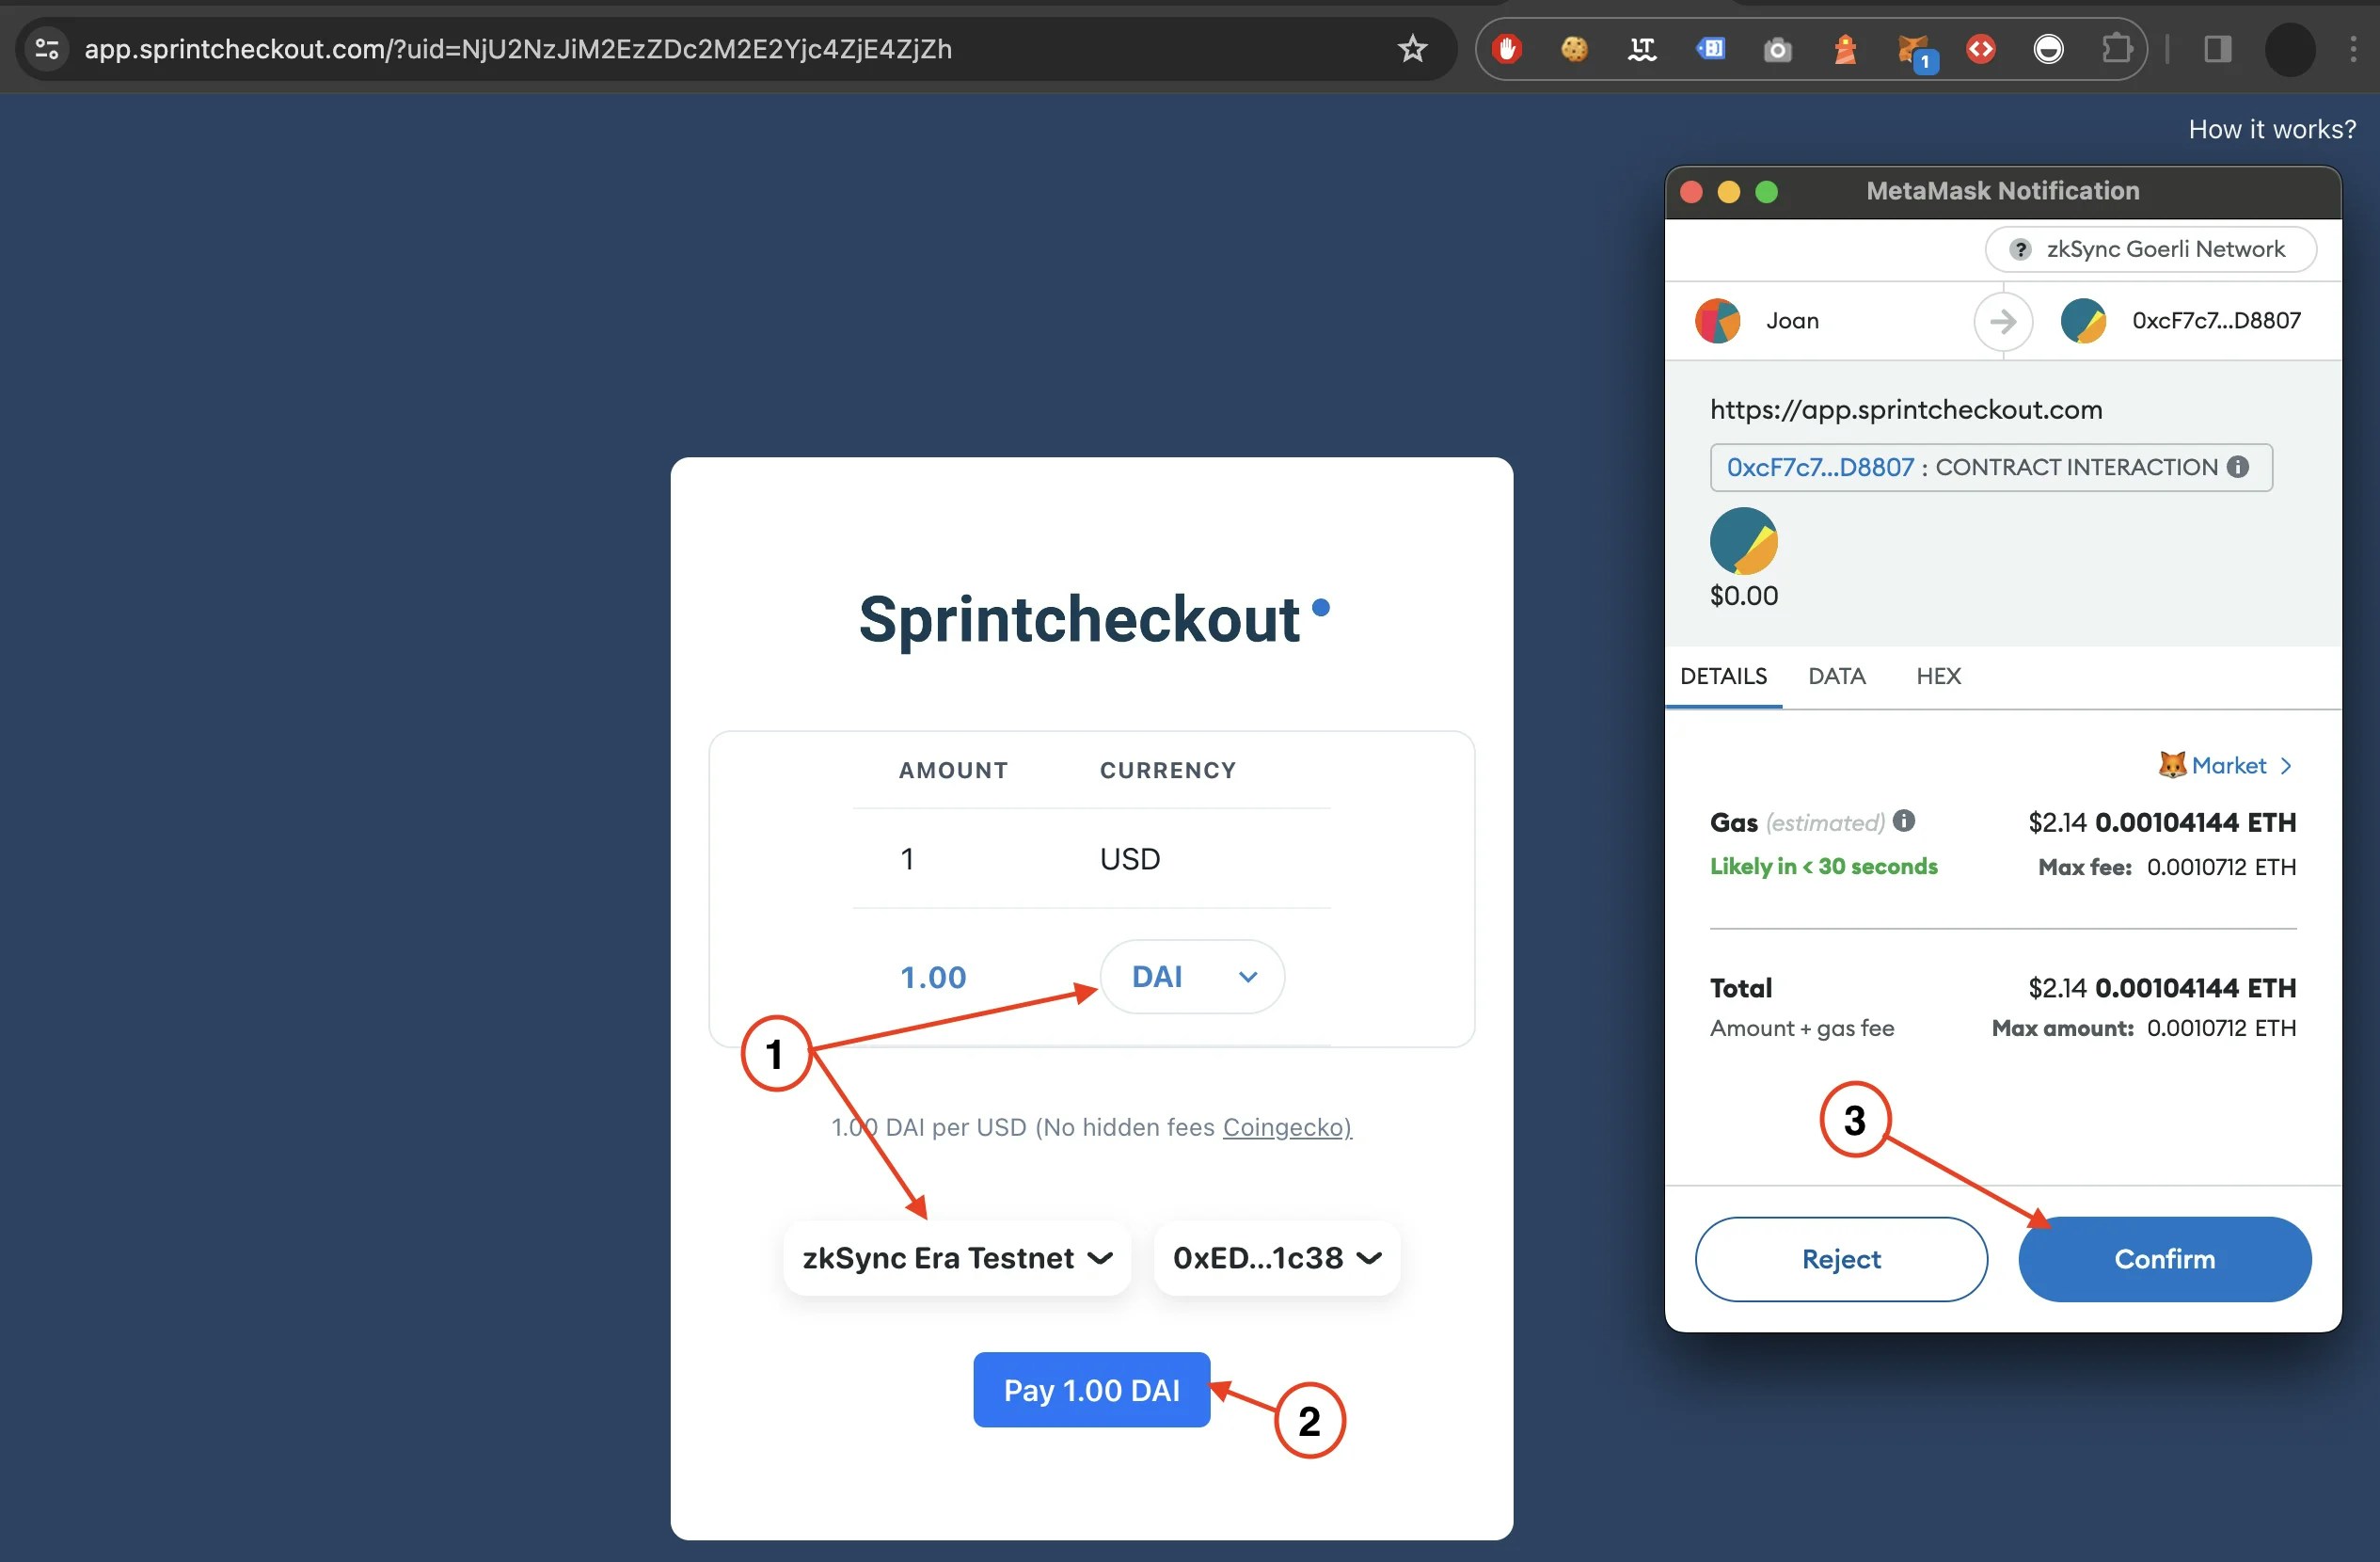
To better understand how Woocommerce crypto payments work for merchants, we need to have a brief look at the customer journey from start to finish. Depending on your store’s layout, the buyer will usually find a product, add it to the basket, proceed to checkout, provide their personal details, and place an order.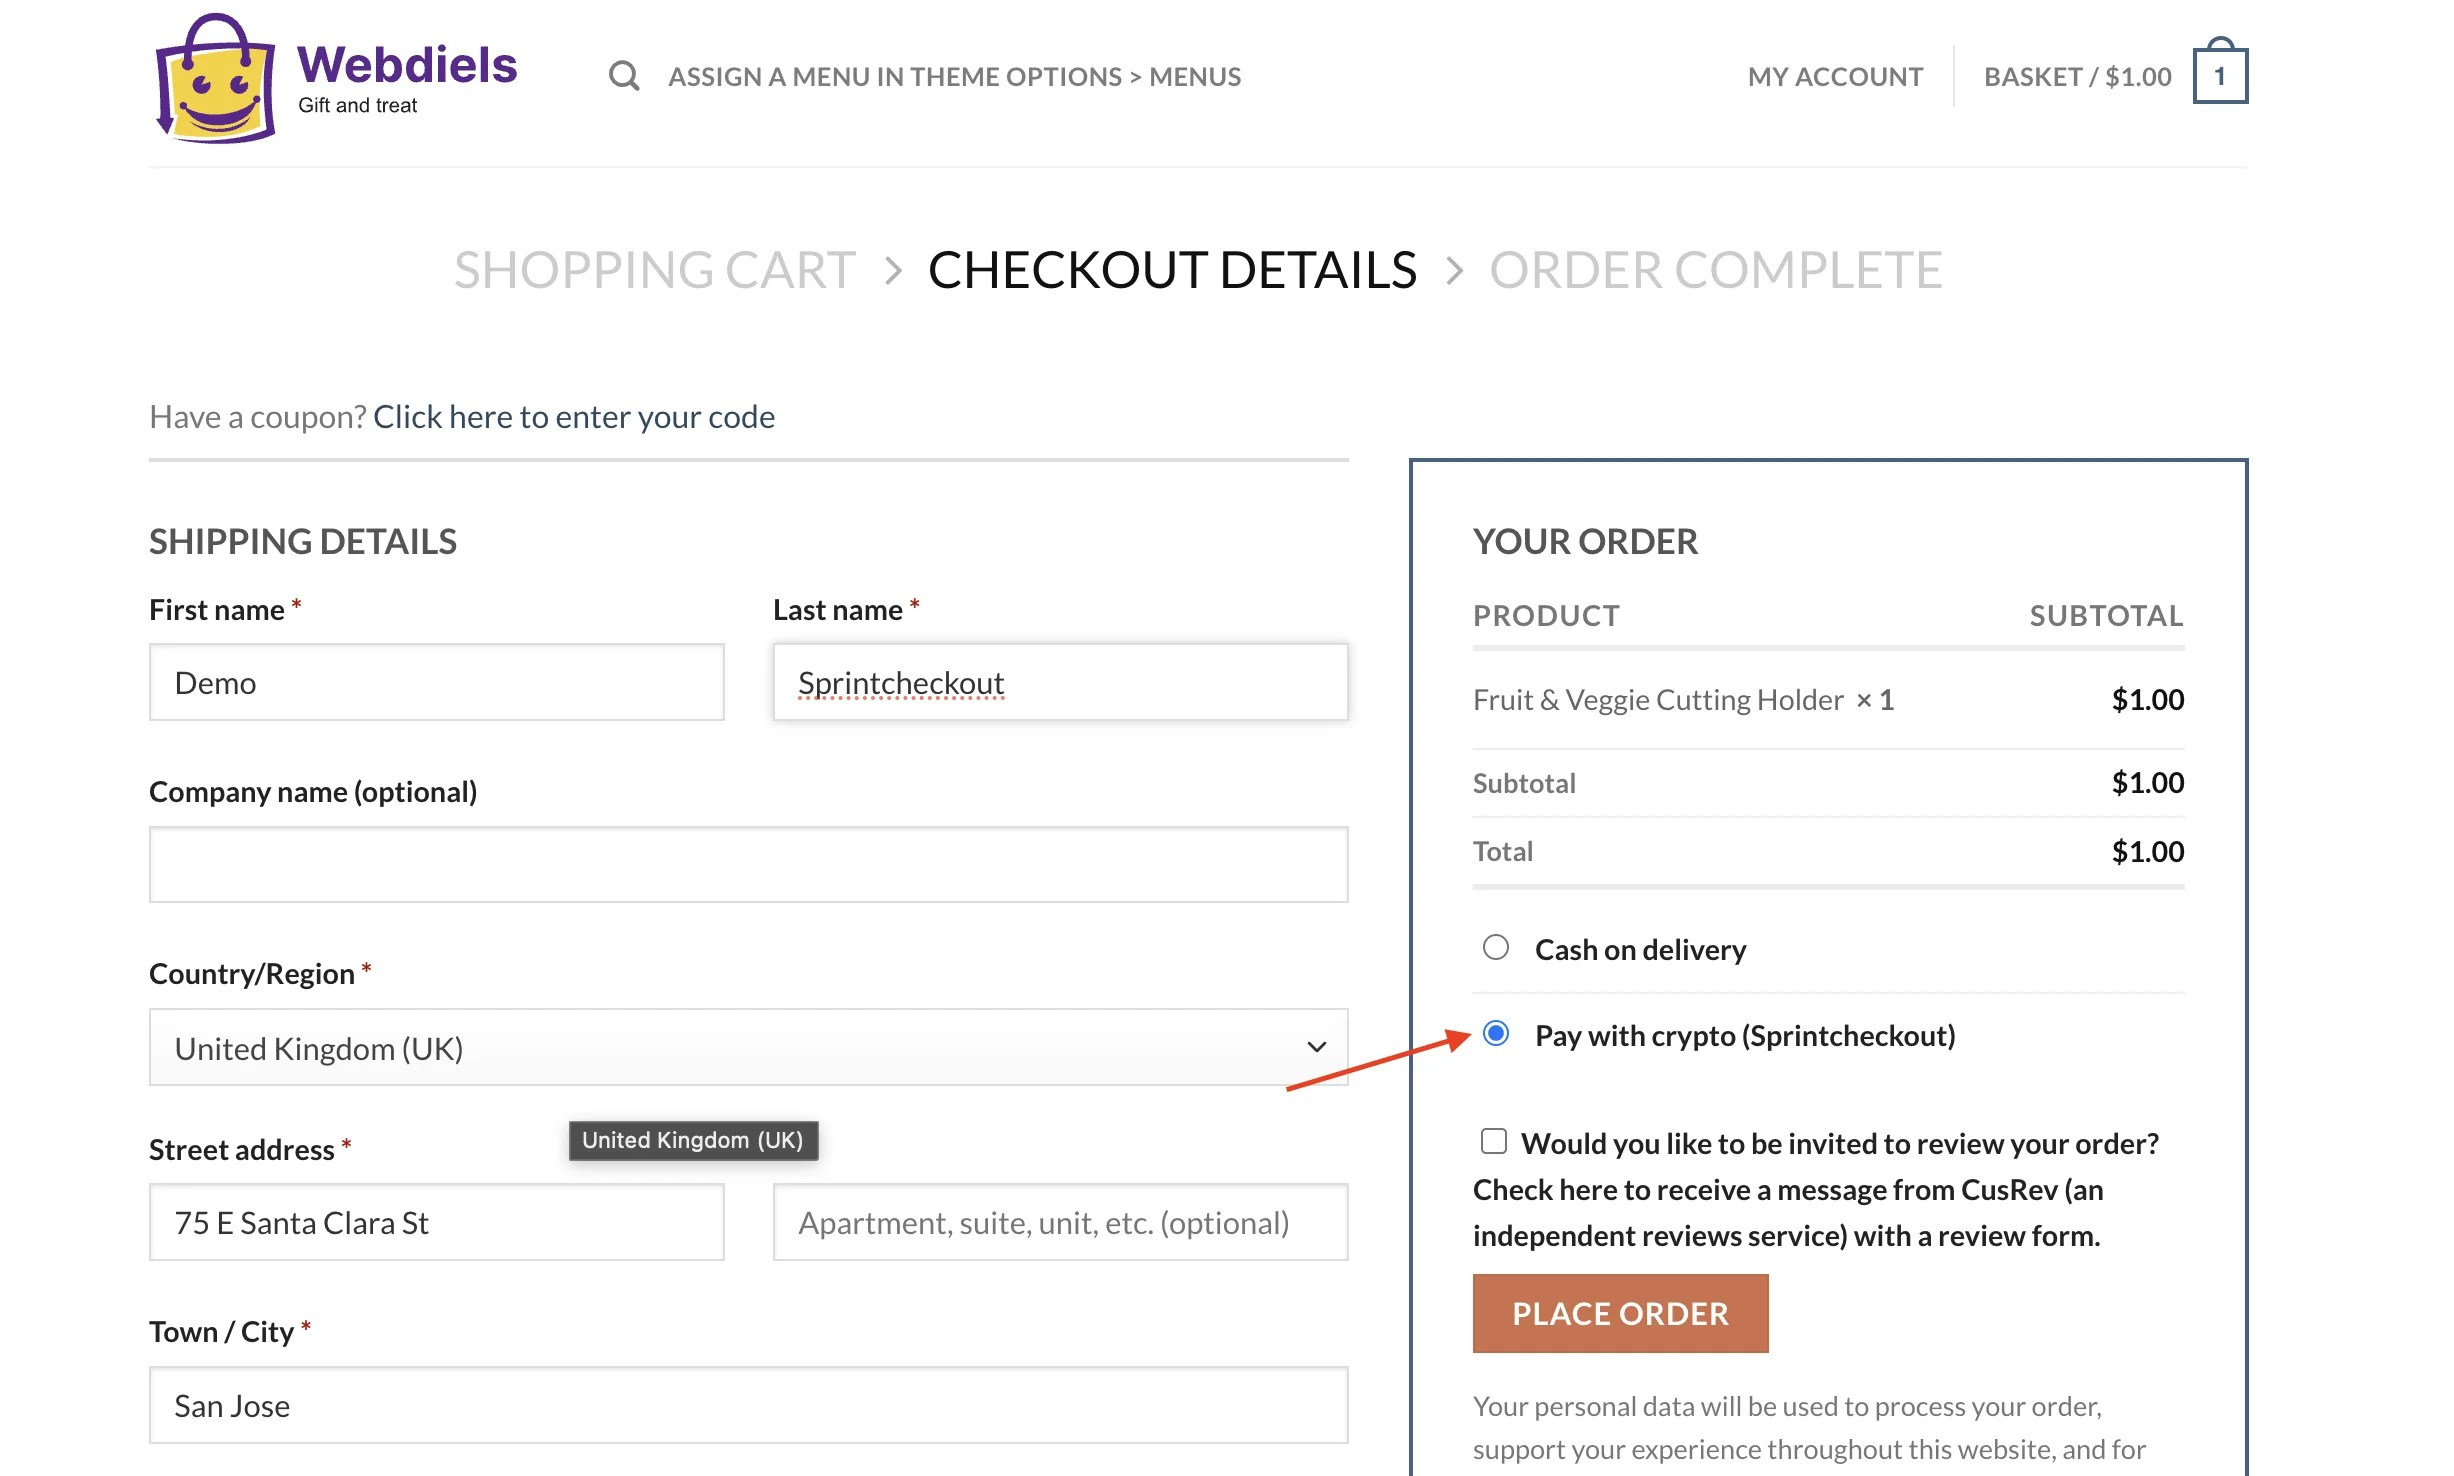
- Select their preferred currency from the options you enabled;
- Proceed to make a payment by clicking on the designated button;
- Approve the payment in their wallet by clicking on Confirm.