Adding a ‘Pay with Crypto’ Payment link
A “Pay with Crypto” payment link on your website lets you easily start accepting cryptocurrency payments. Payment links let you accept crypto payments on your website with minimal functionality. You can create a link for each of your products, and have the button redirect to a static checkout URL for the given product.You cannot change your prices at checkout with payment links. For more flexibility, use the API integration.
1. Create Payment Link
- In the Dashboard, navigate to the Get Paid section on the left menu.
- Select New payment link.
- Set up your payment link settings on the modal.
- Click Create
2. Create Payment Button
- Copy the Payment link.
- Paste it into the following code block:
html
- Place the button on your website.
Features
Templates
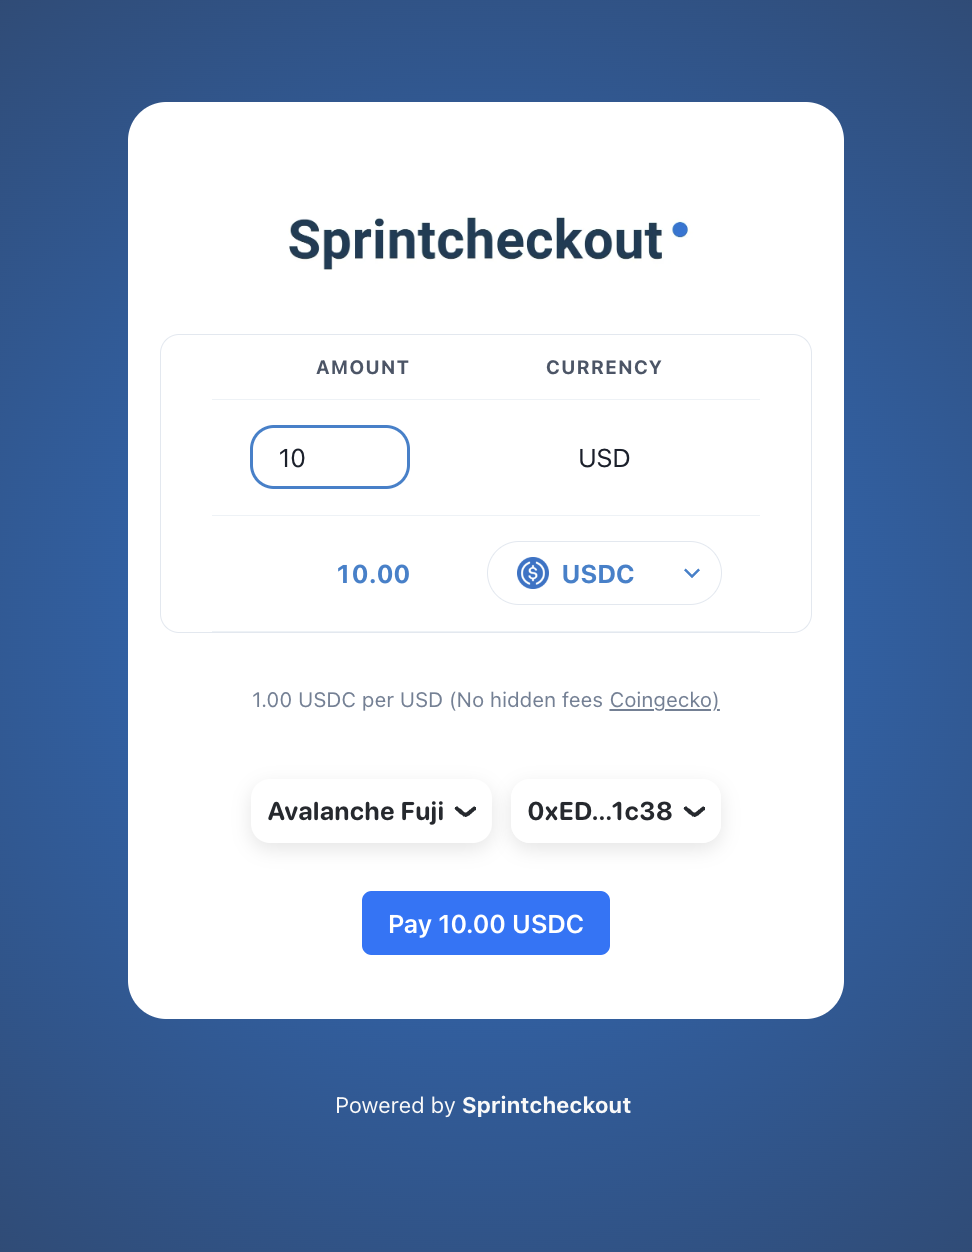
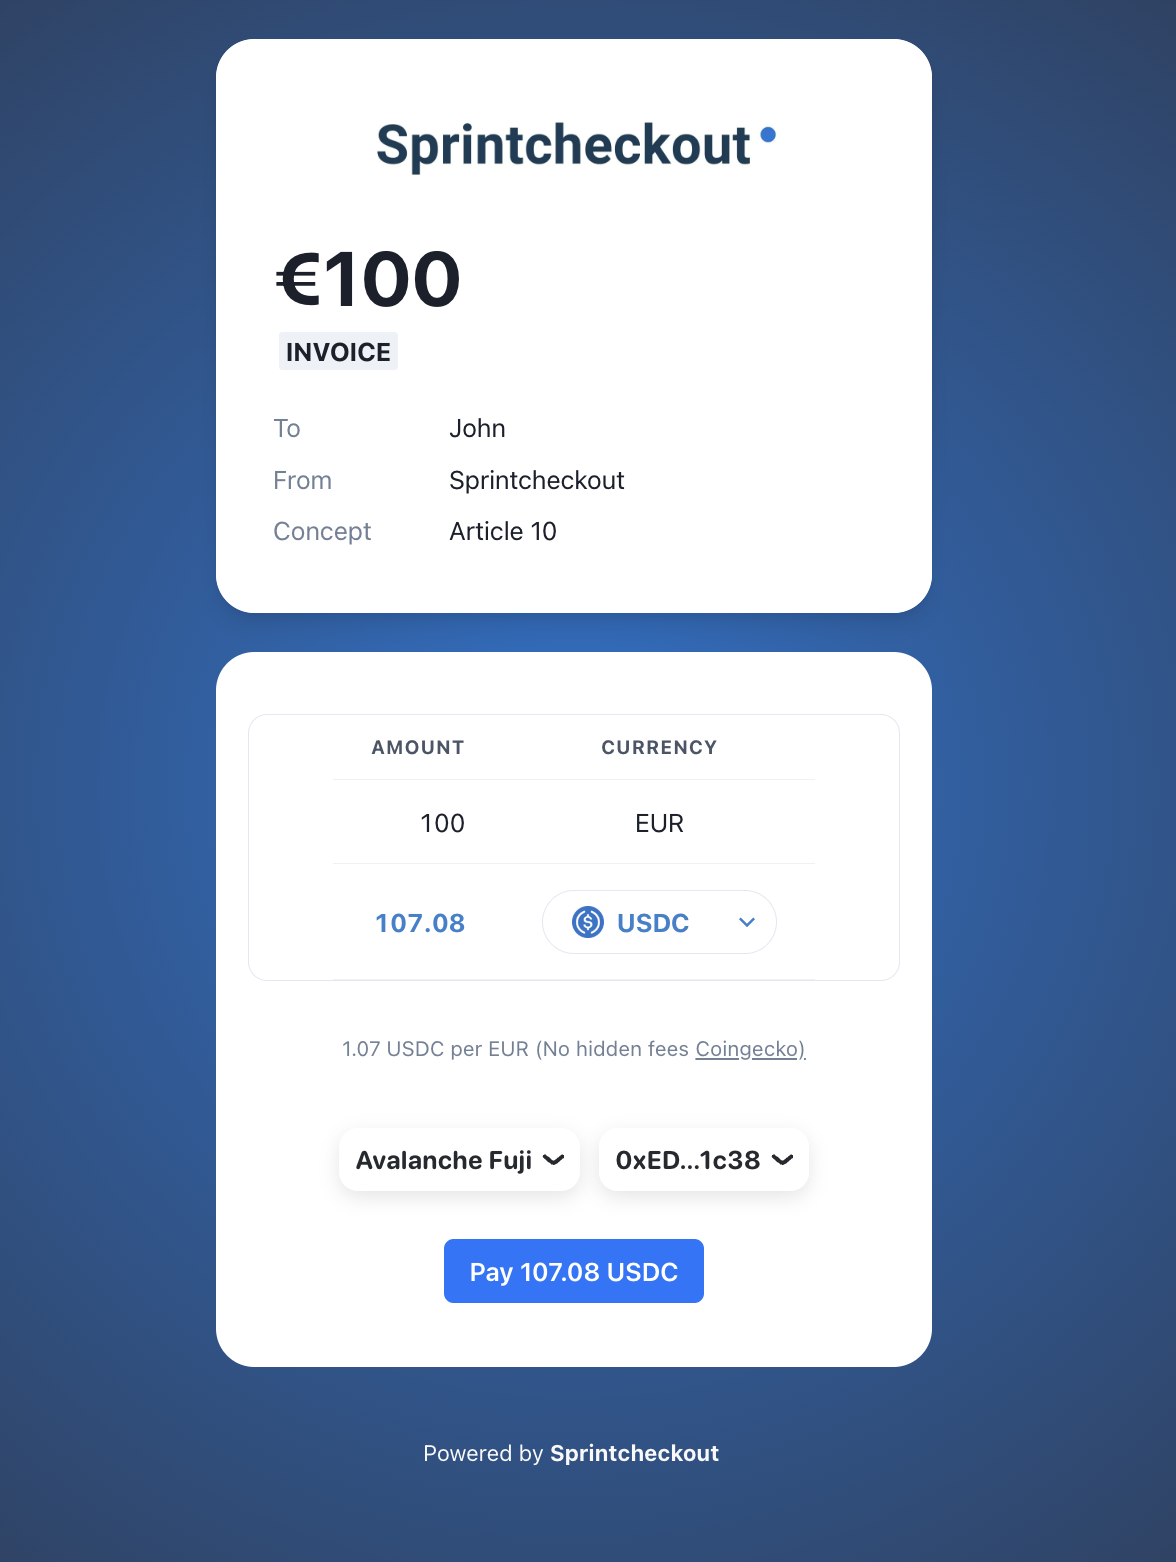
Payment links UI can show invoice details if needed. Select Invoiice on the template selector. InvoicesIf you need to get paid in crypto. The most professional and good looking option is Sprintcheckout Invoices.
If you just need a simple payment UI, select the Light option under templates.